
The outside plates at the eaves should be attached first. Determine the height for these plates by measuring up from a level line this way:
Drive a nail in a pole a few inches above the highest point of ground. With a straight-edge and carpenter’s level establish this level point on all the poles in the wall. Nail a 2 x 4 or a 2 X 6 cleat (about 36 inches long) with its top flush with the measured height from your ground line to the bottom of the plate’s intended location. This cleat is temporary.
Plates should be cut so that their ends will butt together at the poles, with the exception of the plates at the corners. These should be extended beyond the poles on the long sides of the building to support the end rafters on the out-sides of the poles.
Rest the plates on the cleats and nail or bolt them to the poles. Now remove the temporary cleats. Pre-boring the nail holes in the plates will minimize the danger of splitting the wood, yet will not decrease the holding power. Use a 5/32-inch drill for 40 d nails. Plates on the inside of the wall poles are not attached until the rafters are in place.
When heavy snow weight or exceptional winds may be expected, or where load-bearing floors are supported by the poles, bolts are advised instead of nailing to attach plates and floor sills to the poles (see data on page 17). Lag screws with washers may be so used, also.
Ridge Plates
Follow the same general procedure for the ridge plates as you did for the wall plates. Determine the height of the
 |
Inner Pole Plates When the building is so wide as to require extra inner poles, the position of the plates on these intermediate poles should |
||
| LOCATING PLATE ON INTERIOR POLES If the building has center poles, locate ridge plates first on the outside poles. Then a taut string run between them, as shown, will easily establish the location for the ridge plates on the center poles. |
|||
 |
|||
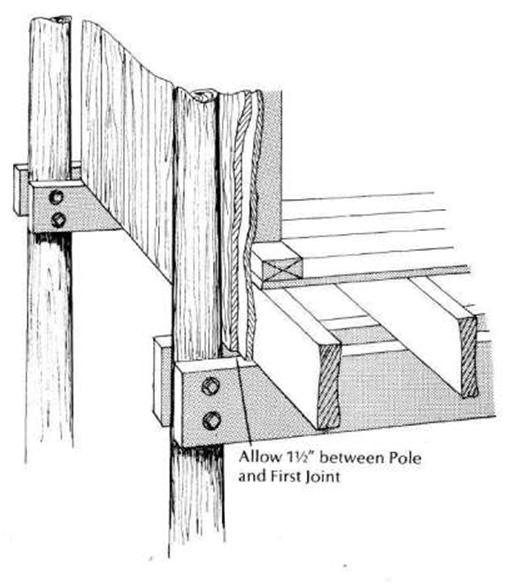
| ATTACHING SILL PLATES TO POLES Walls go inside the poles when finished walls inside are needed. |
|||
|
bottom of the ridge plates (as for the wall plates), and nail cleats of 2×4 lumber on each side of the center pole. Rest the plates on the cleats and proceed to fasten them as with the wall plates with spikes, bolts or lag screws. |
|||
 |
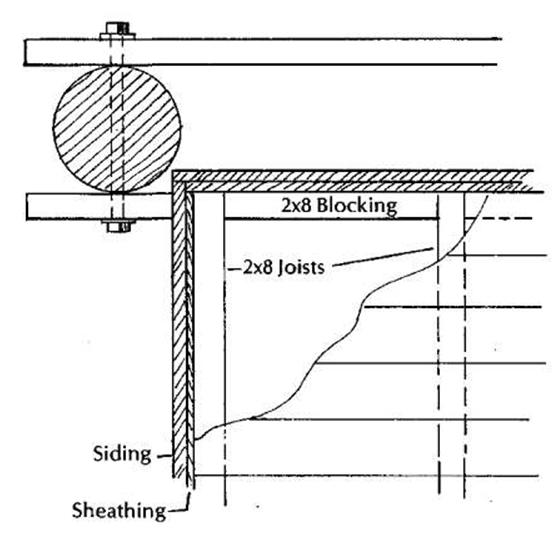
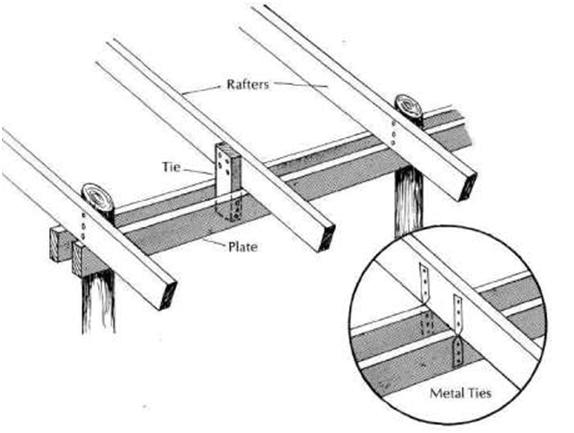
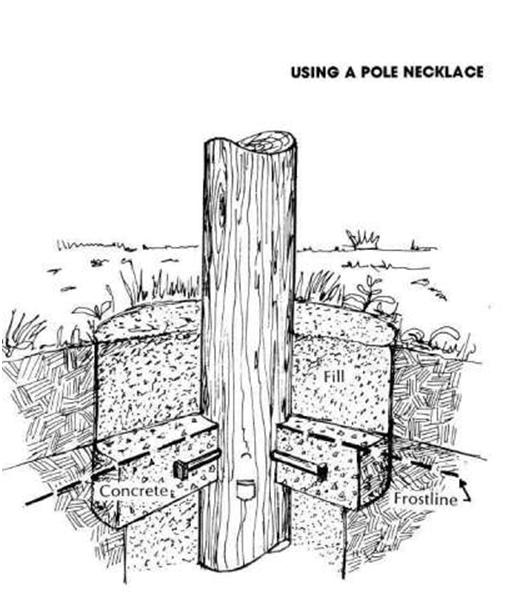
When rafters are in place, the poles should be cut off flush with the tops of the rafters. Anchor other rafters to the plates by means of metal straps or by 2-inch scab boards (or ties), fitted between the rafters. Pole Embedment Proper setting and embedment of the poles is crucial to the strength of the building’s frame. After the rafters are in place, now complete the pole embedment. You may backfill around the poles with the soil dug from the holes, or the backfilling may be done with concrete, soil cement, pea gravel or crushed rock. Clean sand is least expensive and achieves 100 per cent compaction when flooded with water, providing the surrounding soil offers good drainage. When earth is used it must be compacted, a little at a time, by wetting and careful tamping. Over-embedding, however, or use of much concrete, defeats the inherent economy of the pole system. Backfilling with soil cement is an economical way of achieving strength nearly equal to concrete. It is made by using earth free of organic matter and sifted to remove all pieces over one inch in size. Mix five parts of earth with one of cement. Then wet and mix it to a thick slurry and tamp it well into place around the poles. Another method of embedment uses a “necklace” of concrete around the pole below the frost line. It can be cast after the poles are set but not fully filled in. This necklace should be at least 12 inches thick. A minimum of four one-inch diameter lag screws around the pole are required to transfer the vertical force to the necklace. |
||
|
be located by running a line from the ridge plate to the wall plate. Attach cleats and plates on both sides to correspond with this line. |
|||
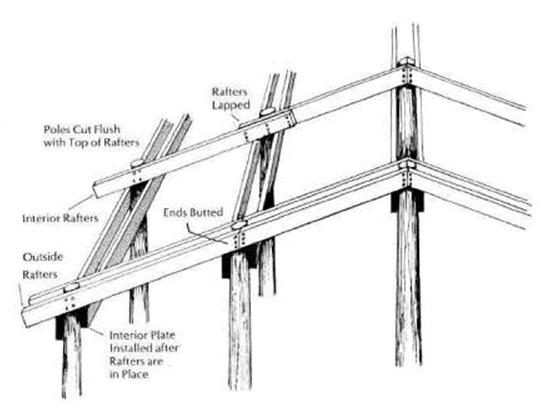
| Rafters Rafters are placed on the outside of the end wall poles and should be butted to provide a smooth base for exterior siding. Extend the lower rafters over the outside plates at the eaves to provide an overhang—usually about 10 to 14 inches. Cut the butt ends of the outside rafters to the proper angle so that the rafters may be nailed to the poles. Intermediate rafters may be lapped. Rafters adjacent to a pole should be nailed to the pole. |
|||
 |
 |
||
| ATTACHING RAFTERS TO POLE PLATES Attachment of rafters above the pole plates is shown here, and in detail the rafter overhang at eaves. |
|||
|
The necklace method is practical only in areas where the frost line does not exceed 2 feet. It would be exceedingly difficult to cast such a necklace at a depth of three feet or more. When embedment of the poles has been completed the temporary pole braces are removed. |
|||
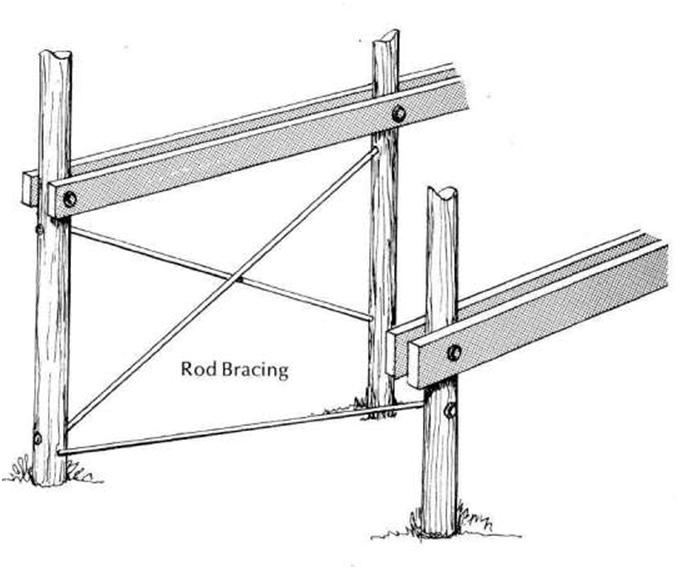
| Inside Wall Plates | Permanent Bracing | |||
|
After the lower rafters are in place, the inside plates on the eaves should be installed. Push the plates up against the rafters and nail or bolt them to the poles, as shown in the illustration for rafters on page 46. |
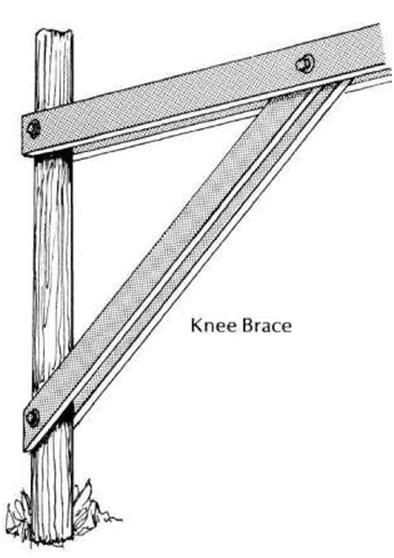
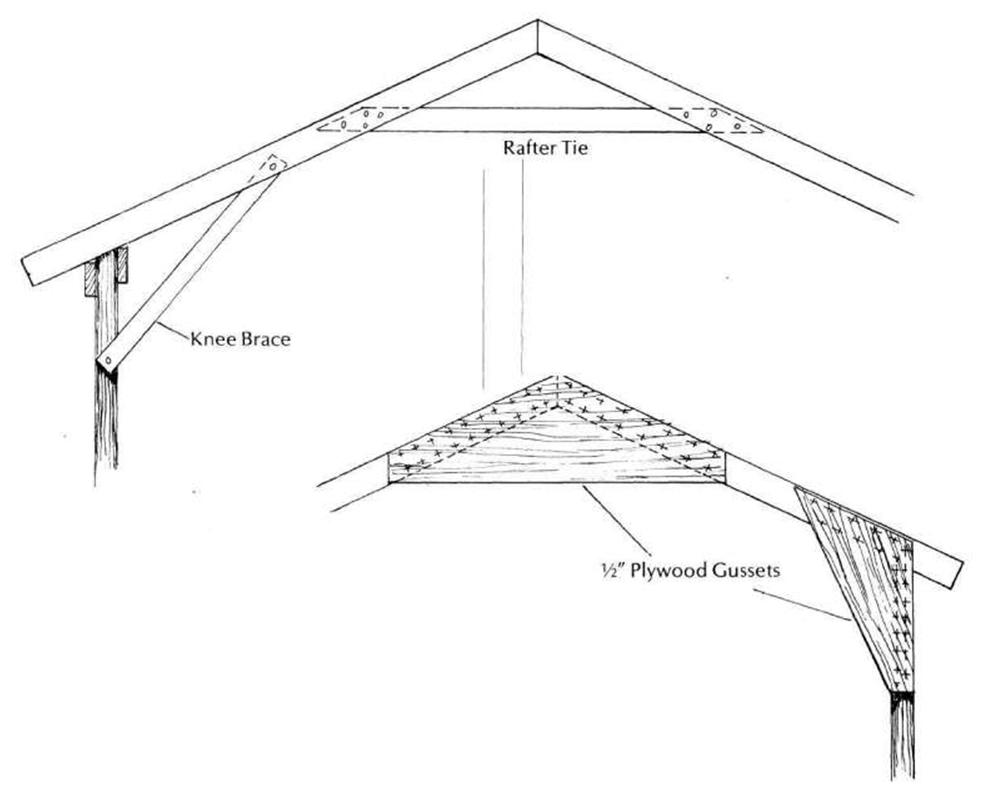
Knee braces or plywood gussets should be installed on the inside of the poles. Nail or bolt two pieces of 2 x 4 four feet long at each end, as illustrated. When there is a wide center space in the structure an additional knee brace or gusset |
|||
 |
 |
|||
| T Y P E S OF ROOF BRACING Bracing is most important also in the roof area. Conventional knee braces are shown in the upper illustration. Below, gussets, which are more effective, are employed. |
 |
||