
| Side Wall Construction If you want to have your pole building fully enclosed to the ground, start at the ground with splash boards. This is true whether you are planning an enclosed farm building, or to put skirting around the poles on which a house is built. Starting about 3 inches under the ground line and extending up the wall, spike splash boards to the poles, using pressure-treated lumber or wood that is inherently rot- |
|||
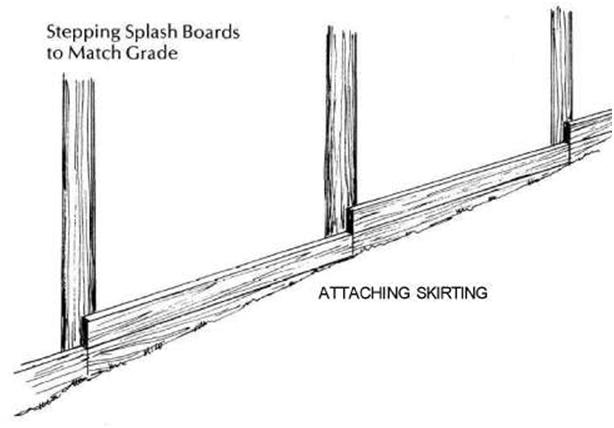 Spacing of purlins depends on the type of roof sheating to be used. Shown is method of “stepping” splashboards on grade. |
|||
|
should be attached to the pole on each side of the center space, as shown. Gussets are better than knee bracing, since they provide greater strength at the hinge points, and they are no more difficult to cut and install. |
|||
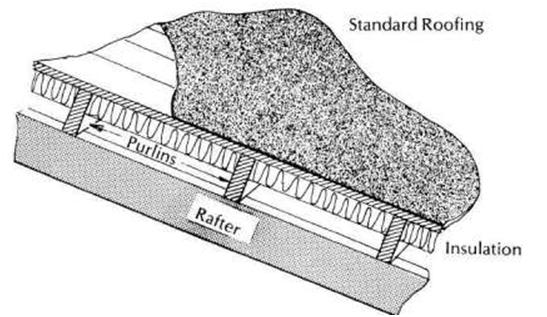
| Roof Sheathing When rafters are spaced 2 feet on center (2 feet apart), no purlins are needed and 1-inch sheathing or V2-inch plywood of sheathing grade may be used. When rafters are spaced further apart, purlins are needed for 1-inch wood sheathing, metal or other types of roofing. Purlins are laid across the rafters and either are lapped or butted, as shown. Rafters or purlins may be spaced up to 8 feet apart when 2-inch roof decking is used. |
|||
 |
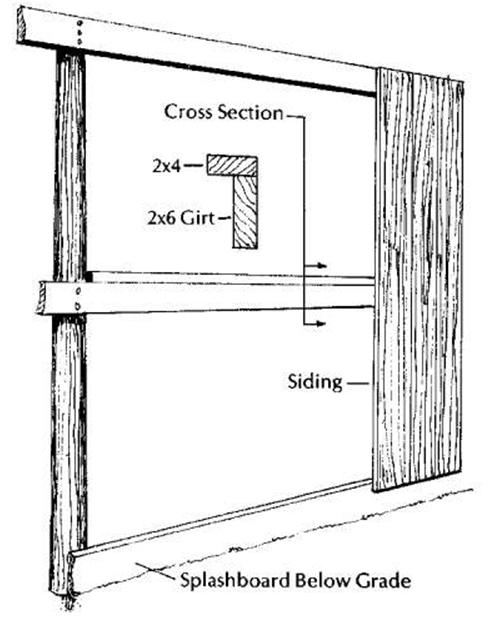
ATTACHING GIRTS Illustrated here Is the use of girts between the poles to support the sidewall sheathing. Shown In cross-section Is the reinforcement of a girt. |
|||
 |
||||
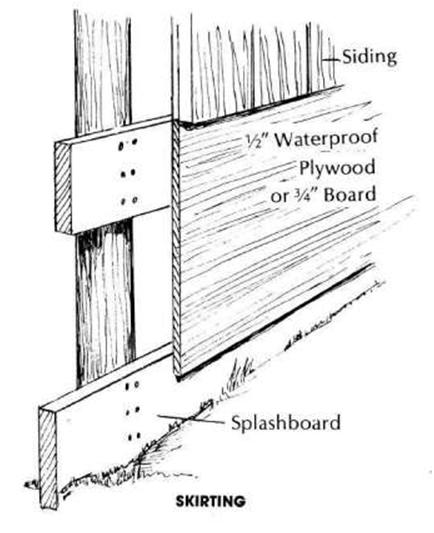
| DETAIL OF SPLASHBOARDS Detail of splashboards and of exterior sheathing method is shown here. Note pressure-treated lumber should be placed below the ground line. In areas where there are termites use asbestos cement board burled In the earth. |
||||
| SUPPORTING UTILITY ROOM | ||||
| Year-round Homes (see Plans on Pages 82 through 97) as well as Vacation | ||||
| Homes adapted to use in cold | periods, | |||
| can employ a utility room base. Further | ||||
| details on such construction are given on Page 74. | 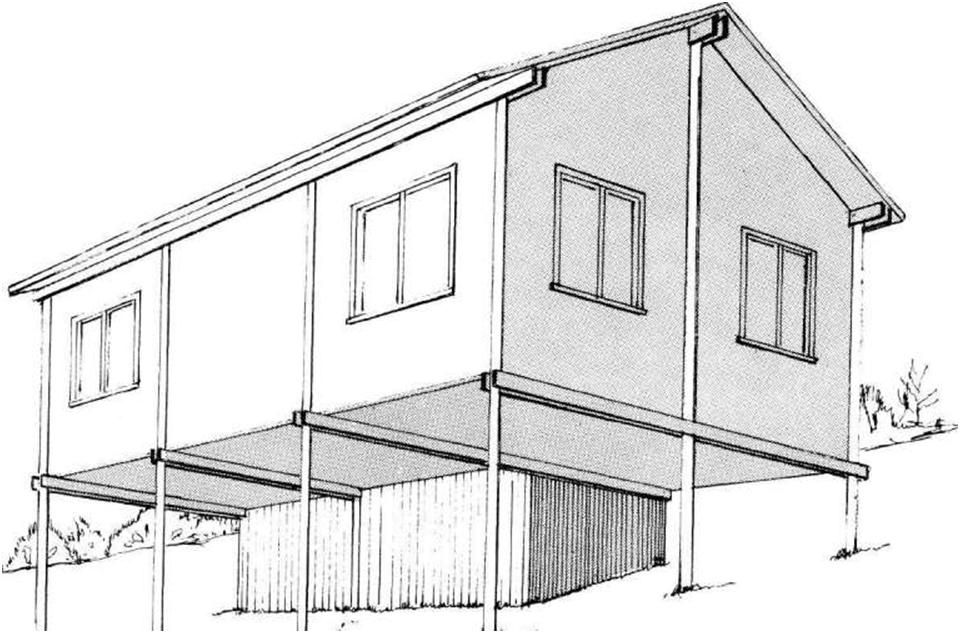 |
|||
| __u»~- | ||||
|
resistant (see page 12). These should be one or two 2 x 10 or 2 X 12 planks. Girts for the siding are nailed across the poles above the splash boards. They should be spaced on 2 feet or 4 feet, depending upon the type of siding to be used. Generally speaking, metal siding will require 2-foot centers, while wood can be on 4-foot centers. If the space between poles exceeds 6 feet, a 2 x 4 is placed (as illustrated) on each 2×6 for reinforcement. However, metal siding always will require more reinforcing than wood. Vertical boards and battens (or other kinds of siding such as plywood or metal) then are attached to the girts. In any case, the top two inches of the splash boards should be overlapped by the side walls. Reinforced girts usually provide adequate sidewall rigidity when spaced as close as two feet apart. Placement of vertical studs, toe-nailed to sill and eaves plates, will be used where windows interrupt the girts. Windows and exterior doors should be framed in with wall studs in any event. Studs perform no weight-support role for either roof or floor, however, in pole construction. Safe pole distances and adequately heavy eaves and floor plates do it all. Floor Construction and Insulation Most pole buildings, unless a dirt floor is in order, will have a slab floor (see bottom illustration on Page 54) or a suspended floor, and if these buildings are to be located and used in cold climate areas, construction should be planned with the view to effective floor insulation. Methods of suspended floor joist attachment are shown on Page 53, while |
 |
||
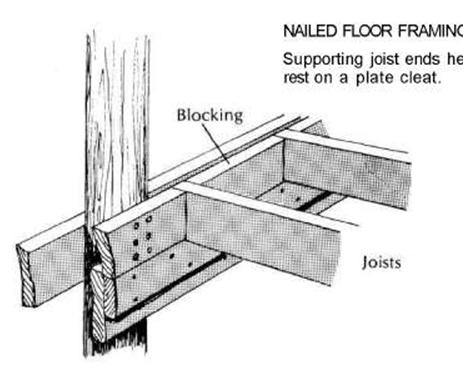
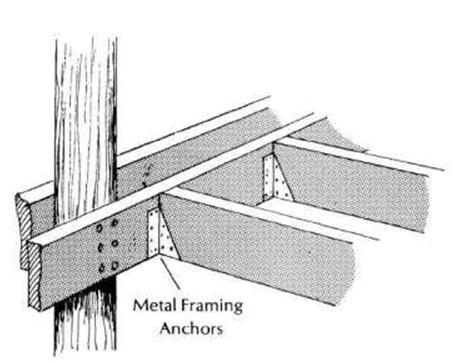
| ANCHORED FLOOR FRAMING These suspended joists will not support as heavy a floor load.
|
|||
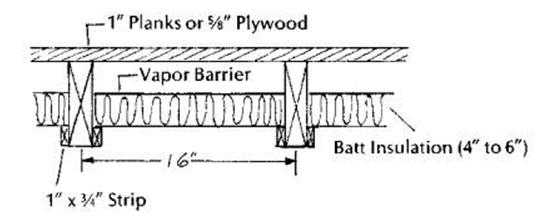
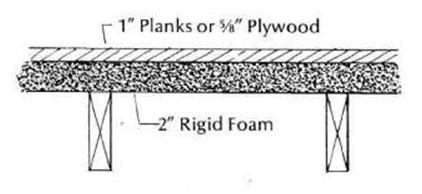
| FLOOR INSULATION | |||
| Open floor is insulated from below with batts hung between joists. | Alternate method places rigid foam atop joists and below flooring. | ||
 |
 |
||
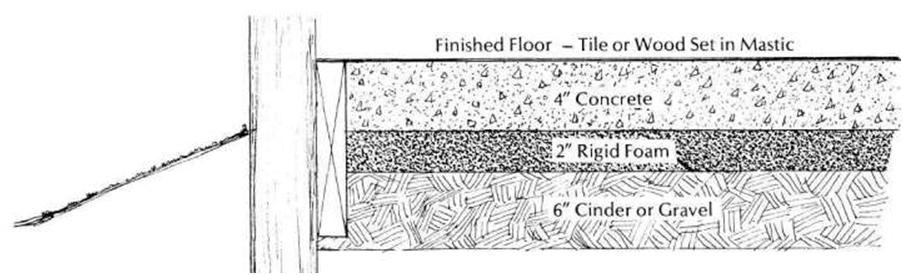 Floor built on grade requires vapor seal below concrete. |
|||
|
those which are illustrated on Page 44 will provide for greater floor loading. The chart on Page 56 provides safe formulae of load and support for both floors and roofs. In cold country take into account the weight of possible snow accumulations, particularly if the roof pitch is shallow. In slab floor construction do not overlook the need to lay a vapor barrier of polyethylene sheeting under the slab. Otherwise the slab will absorb ground moisture, and some serious problems may develop later. In climates where termites occur, ring cups may be placed around the poles and the wall skirting is not run down to the ground level. |
INSULATING THE ROOF | ||
| Batt insulation is set between roof purlins, below sheathing. | |||
 |
|||