
- Introduction
- Founding and Site Work
- Roof Bearing Assembly
- Base Plates
- Window and Door Bucks
- The Straw Bale Wall
- Above The Straw Bale Wall
- Lath
- Stucco
- Interior Walls
Introduction
The building detailed in the pages below is the best house the Red Feather Development Group presently knows how to build; thus there is a great deal of knowledge arid experience embedded in this prototype. But since we learn something new on every building project, and as straw bale construction is in a remarkable phase of growth with new and better techniques being invented each season, at this time we can only give you a recipe for Red Feather’s best
building so far, mindful that we will no doubt have further improvements to offer after these pages reach the press.
However, by following the suggestions in this article you will be spared many of the pitfalls of building with straw bale, having benefited significantly from our mistakes.
There are infinite ways to build a house. In writing this article, we have further refined the typical Red Feather house, Our criteria in making improvements is summarized in the following list;
- Ease of Construction: We present a straightforward process that we know will work.
- Low Cost: Our objective is to get the most house for the least expense.
- Ease of Community Involvement: The process described here utilizes volunteer and community labor and so we have (wherever possible) reduced the need far professional expertise.
- Environmentally Sound: The house presented here is built of materials that, whenever possible, are local in origin, non-toxic in composition and energy-efticent in practice
- Long Life/Loose Fit: We offer a building that will Iast, one that easily adapts to the changing needs of its inhabitants
For those new to straw bale construction
A straw house? Yes! People have been building with straw for millennia in places all over the world From the grass huts of pre-history so the thatched roofs of Northern Europe, straw has long been a building material. About a century ago, after the advent of hay-baling machinery, farmers in tree-scarce Nebraska developed a way of building homes with baled straw. Some of these early straw bale buildings still exist drill continue LG perform well. Like jazz music straw bale -construction is a native. American technology. Moreover, during the last few decades, the United States has become increasingly interested in straw bale construction. As a result, much has been learned, and building methods have vastly improved, in part because these structures are intensively tested and researched, and thus prove straw bale construction to be a viable and code-compliant method of building. Straw bale buildings have been constructed in Alaska and most—if not all—of the continental United States. Except in localities with excessively humid climates,
such as the Gulf Coast and the Hawaiian Islands, straw bales an appropriate technology.
Straw is a particularly good choice in cold and dry places—like Northern Plains and the American Southwest—where super-insulated buildings are desirable. Still, skeptics abound, so we may need to explain the obvious: straw is not hay. Straw bales used for building are an agricultural by-product. Whether left-over stalks of wheat, rice, or a similar plant are used, the nutritional port on of the grain has been extracted. What is left—the stalks (or “culm,” to adopt the agricultural term)—has little food value. This is good news for bale construction because insects and animals have no interest in eating straw bale wildings.
After being coated with stucco, bated straw resistant to fire. But just as poorly maintained conventional jobsites become dangerously flammable when wood scraps and sawdust are left lying about, so builders using this handbook should keen loose straw cleaned up and away from sources of combustion. Obviously welding, smoking, and other open-flame activities should be kept well away from a pre-stucco straw bale building.

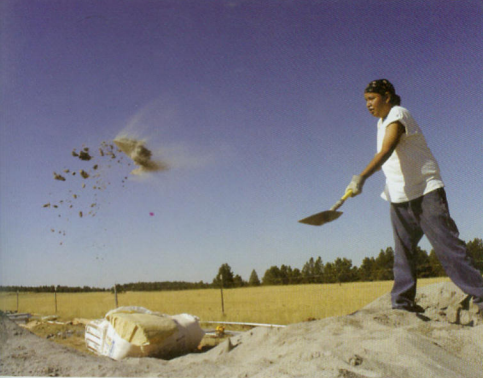
Founding and Site Work
Your home’s position relative to the land on which it sits has significant effects on its beauty and thermal efficiency. Consequently, you will want to spend some time considering how to orient your house to make the best use of your building site.
There are several factors to consider here: local customs, potential views, windbreaks, existing roads and infrastructure, existing utilities locations, the warming path of the sun, as well as your preferences and intuitions. If at all possible, you might want to visit the land in different seasons, and talk with neighbors who have experience placing buildings in the vicinity of your site.

Other things being equal, you should orient your house with its longest and most window filled wall facing slightly east of south (for sites in the Northern hemisphere) With this orientation, the low winter sun warms the interior of the house through the windows early in the day when the house most needs heat. Once the interior thermal masses (stone or wood floors, for example) are charged with heat, they will continue to warm your house on into the night hours.
In the summer, with the sun at a higher angle, its rays, blocked by the roof overhang, will not overheat your house Windows should be less numerous on the east and west walls , and care should be taken to avoid the glare of the rising and setting sun. Because glare is not a problem from the north, northern light, generally diffuse, is good for lighting buildings during the day.
Foundation design depends on several factors: local climate, soil composition, building size and weight, and exposure to wind and earthquake forces. You will need to talk builders in your area, and consult local building codes to determine what kind of foundations most appropriate for your site. However, do not attempt to design your own foundation. This is work for professionals and the future of your building rests upon the ability of your foundation to do its work—that is, to support the load of the building and provide a strong, dry platform.
Concrete is a readily available and useful building material. However, roughly 7% of greenhouse gas emissions worldwide stem from the manufacture of Portland cement—a major component of most concrete mixtures. Given this negative environmental impact, we offer you to tries to keep the amount of concrete in its structures to a minimum, and advocates that you use concrete mixes containing fly ash, a waste by-product of the coal industry which can replace Portland cement to a great extent. Ask your concrete supplier early on about the possibility of using a fly ash mixture.
The shallow frost-protected foundation recommended below benefits your project in several ways. Less digging means less money, work and time as well as less concrete, all of which minimize disturbance to your topsoil and site vegetation. However, whatever foundation system you choose, be sure that it provides a level and appropriate base for
your bale walls and, most importantly, that it keeps your bales protected and dry.
Steps in Constructing a Foundation
- Excavation: Start by removing topsoil as required for the foundation. Pile topsoil carefully in a convenient location to spread back around the completed building. Grade a level area down to undisturbed soil for the building’s footprint. Dig out trenches for the foundation slab and thickened edges. Place an even 4″-6″ layer of washed gravel, or screened and washed crushed rock (3/4”-1″) in the trenches. Provide for electrical and water utilities within the
interior of the foundation. Plumbing should never be run in the bale wall. It is best if all utilities come up through the floor slab. - Place Forms for the Stem Wall: Place forms in the trenches, and make them level and plumb to the dimensions of the foundation plan.
- Place Steel Reinforcing: (Rebar with recycled content above 95% is available): Follow the foundation plan and details to place steel reinforcing (rebar) components within the foundation forms.
- Pour Concrete: Pour concrete into perimeter formwork and give it time to cure.
- Place Slab Underlayment: Check that interior area is level. Place and grade gravel. Add sub-slab insulation, as required for cold climates, under 6 mm polyethylene sheeting.
- Place Slab Reinforcement: Place slab reinforcement (metal mesh on top) as per foundation plans.
- Place Radiant Floor System Loop:
- Pour the Slab: Be sure to maintain an insulating thermal break between the slab and the perimeter stem wall.
- Allow for Proper Curing: Foundation must cure before proceeding to the next step.
Roof Bearing Assembly
Your Roof Bearing Assembly (affectionately known as RBA) is a hollow box beam that you will build with plywood panels on the top and bottom, and wood I-beam joists (also known as TJIs) on the sides. This assembly gives rigidity to the upper bale wall, provides an even-bearing surface on top of the bale wall, and a structure to which you can attach a conventional roof framing (like pre-fabricated wood trusses), and distributes the load of the roof and ceiling components. It also connects the roof to the foundation, and serves as a continuous member spanning door and window openings. A strong, straight, and uniform RBA is a critical component of your straw bale house.
There are several ways to construct an RBA. For smaller structures with lighter loads, it may be as simple as a “ladder” built of 2×4 members that is then placed on top of your bale wall. Several years ago, we adopted a box beam style of construction for larger buildings, and more recently we have been using I-beam joists (commonly used for floor
construction) for the structural sides and internal blocking of our RBAs. An RBA built of I-beam joists is recommended because of its light weight and increased strength compared to an RBA made with solid lumber. In addition, I-beam joists can be purchased in almost any length. Moreover, they are a sustainable building product since they are fabricated without the need to sacrifice old-growth, large-diameter trees.
Constructing the RBA
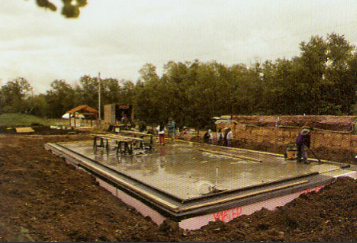
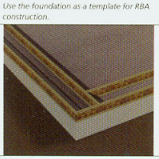
Despite its position above the straw bale wall, the RBA is the first thing you will build once your foundation is complete. It is crucial that the dimensions of your RBA match those of your foundation slab exactly if your walls are to be straight and plumb. So it is best to use your foundation slab as a template for laying out and constructing your RBA. Later in the construction process, the slab floor will be cluttered with other elements of construction, so build the sections of your RBA on the slab and then set them aside for later installation.
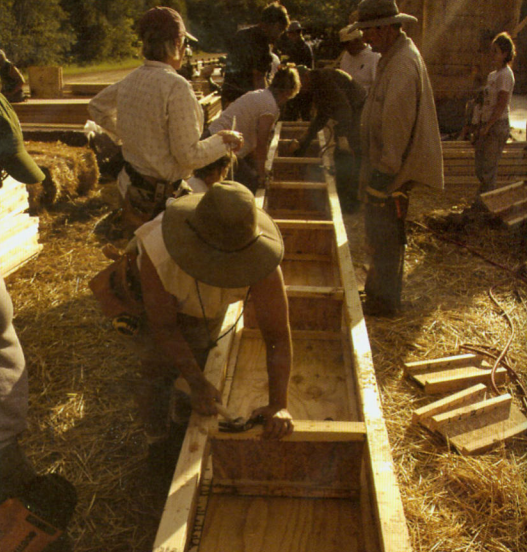
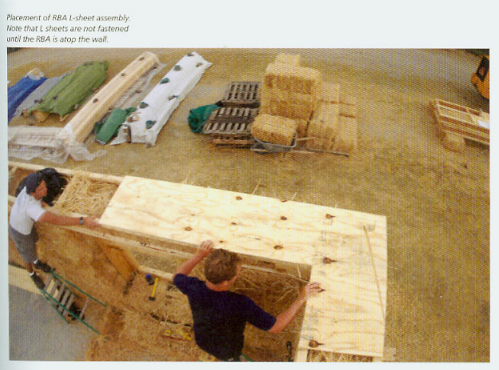
Make sure to have enough people on hand to help move the RBA sections safely. It is best to assign one person the responsibility of directing the group when moving RBA assemblies.
Steps in Constructing Your RBA
- Layout Construction Lines on Slab: Using a chalk-line, measure the width of the RBA from the slab edge and snap guidelines on the slab itself.
- Cut Joists: Cut I-beams to size and lay the pieces on the established chalk-lines.
- Cut Spacers: Cut lengths of scrap as spacers (blocking) that will run perpendicular to the sidewalls of the RBA.
- Nail the Box Beam Together: Fasten the I-beam portions of the RBA together providing perpendicular I-beam blocking at regular intervals; the interval should match that of the trusses that will bear on the RBA. Verify the spacing with the roof design drawings and make sure that each truss will rest above blocking. Build straight RBA sections that are not too large to handle later during RBA raising. At this point the RBA will look like a number of ladders each awaiting the attachment of its plywood sheeting.
- Rip Plywood Sheeting and L Sheets: Cut strips of plywood wide enough to serve as the top and bottom sheets covering the I-beam ladders. Also cut L-shaped corner connector pieces and set them aside. These pieces will be used as connectors when you install the RBA on the top of your bale wall. When 24″ wide 3-string bales are used there is little waste of plywood for the sheets are cut to 24″ widths and the L-sheet remainders may be used to cover the straight portion of the RBA.
- Sheet One Side of the Box Beams and Fill: Fasten a plywood sheet to one side of the RBA ladders. Then turn these ladders over and fill them with loose straw flakes for insulation.
- Reposition Beams on Slab: Set the straw-filled box beams back on the construction lines you drew on the slab, and line them up carefully.
- Sheet the Topside of Each Beam: Nail plywood tops onto the insulation-filled ladders.
- Number Sections and Slab, Stack Completed Sections Aside: Write “key” numbers on the various RBA sections and write the same number on the slab area on which each piece was formed. This is necessary since it will enable you to put the right RBA sections on the part of the foundation slab where they were laid out and constructed. Finally store the RBA pieces, and clear the foundation area to begin the construction of your bale wall.
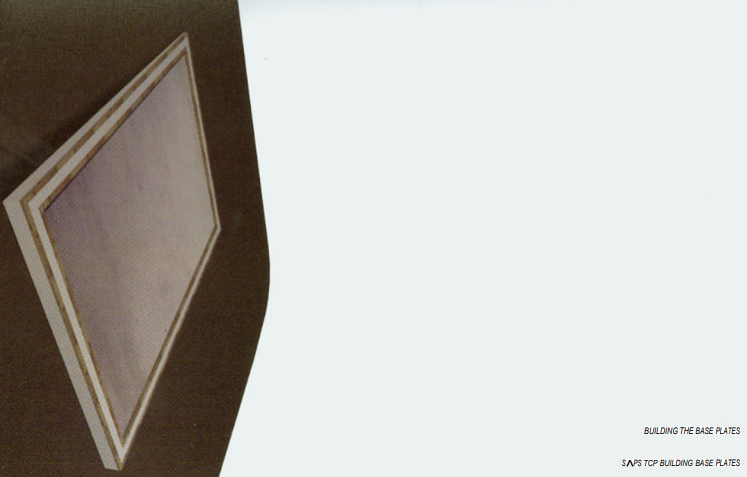
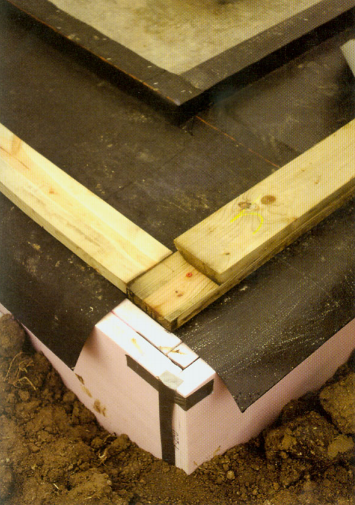
BASE PLATES
The first task is the preparation of base plates. Base plates provide a stable and dry place on which you will set the first course of straw bales. These plates consist of strips of lumber laid out around the foundation edges. The outer base plate is installed flush with the outside face of the foundation. The inner plate, which may contain a chase for electrical wiring, supports the bale wall. You will fill the space between these inner and outer plates with rigid insulation that will serve as a thermal break between the interior of your home and the outdoors. Elevating the base of the straw bale wall from your foundation slab in this way protects the bottom of the bale wall from moisture that might collect on the slab in the event of, for example, a plumbing failure.
With the bale wall raised by these base plates, there is little chance that the bottom course of bales will ever be sitting in standing water, as they might be if the first row of bales were placed directly on the foundation. Any moisture that finds its way into the bale wall from the sides or top will dram out through the gaps in the rigid insulation you will place between the plates and then be directed outdoors through weep holes—shallow saw cuts—that are cut into the bottom of the outside base plate. Base plates, in short, keep your bales high and dry above the finish floor. They also serve as important points of attachment for later construction. Lath, base screed for stucco coats, and the metal coil straps that connect the plates structurally to the RBA all will be fastened to the exterior base plate. The interior base plate functions not only as a channel for electrical wires, but also provides an attachment point for base screed, and eventually base trim.
Building the Base Plates
Lay out your base plates using the same chalk lines you used to construct your Roof Bearing Assembly, If the lines are not clear, you will need to re-snap them.
Next, locate the door openings. As the base plates do not run through these openings, you will need to identify door positions prior to laying out the base plates. Be sure not to use glues and/or fasteners in doorways if your slab is to be the building’s finished floor.
As with RBAs, base plates can be as simple as treated 2x4s laid flat under the bale wall with insulation placed between them. However, in larger structures, it is best to use a double layer of pressure-treated 2x6s for your exterior plate and, for the interior one, a built-up assembly of pressure-treated lumber in the form of a C-shaped channel opening to the inside. This channel will be used to contain the electrical conduit.
Once the base plates are laid out and positioned, a waterproof membrane is attached. Then you can fasten the plates to the foundation with a ram-set, or bolt and pin them to the slab with a roto-hammer and wedge anchors or rowel pins. After you have attached them to the slab, drape the interior base plates with a layer of waterproof membrane, and fasten it in place to protect the wood plates from contact with later stucco work.
Next attach the exterior base plates to the slab (over waterproof membrane) and fill the space between them with strips of rigid insulation left over from building the foundation. Cut these insulation strips to the height of the base plates and install them vertically in order to maximize the number of seams that will be able to convey water down and away from your straw bale wall.
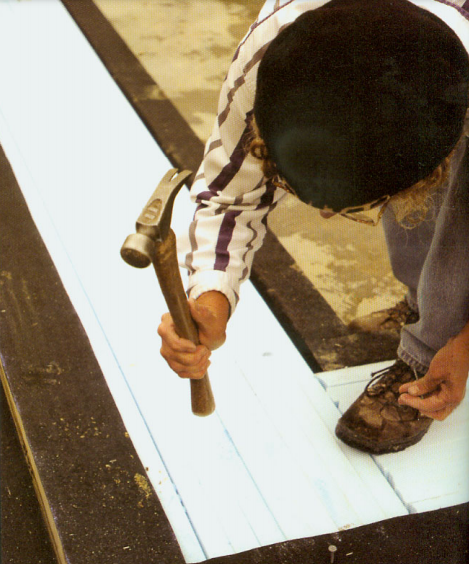
Complete work on the base plates by providing traction nails to prevent the bales from moving from their seats atop the base plates. We recommend nailing 20 penny galvanized nails about half-way into the base plate (space at 8″ on center and stagger the nails between the inner and outer plates) The exposed portion of this nail array will keep the bottom of your bale wall firmly in place.
Note: Pressure-treated wood must be used for all wood directly in contact with concrete foundations and where wood may be exposed to water. The chemicals used to make wood rot-resistant have typically made it hazardous for those who used it or breathed its toxic sawdust. Thankfully, commonly available, pressure-treated wood products now exist that are non-toxic and therefore far better for the environment and carpenters alike. Make a point of selecting non-toxic pressure-treated wood products in order to enjoy a healthy home and a safe construction site.
Steps for Building Base Plates
- Establish Construction Lines: Clear the area around the edges of your slab, and re-snap the chalk-lines you used in constructing the RBA if necessary.
- Layout Door Openings: Mark the location of all doorways around the perimeter of the slab. These openings will not receive base plates.
- Layout and Cut Pressure-treated Plate Stock: Cut base plate sections to length and place the pieces in their correct locations.
- Assemble the Interior Base Plate: Nail and glue the component pieces of your C channel base plates together.
- Attach the Interior Base Plates to the Foundation Slab: Cut and/or position base-plate sections so that they fit together at connections and corners. Then attach the plates to the concrete slab using one of the fastening methods listed above.
- Moisture Protection: Drape a continuous piece of waterproof membrane over the top of the interior base plate and then outward to the edge of the foundation. This layer will serve to keep any moisture that develops in the bale wall from entering the building and will guide it out through the weep holes produced in the next step.
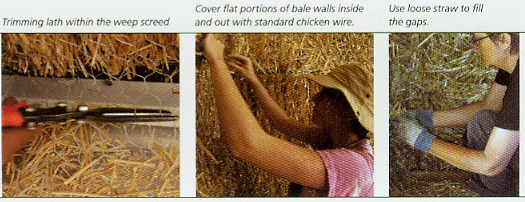
- Moisture Escape: Make weep groove cuts across the bottom of the exterior base plates to allow any moisture within the wall a means of escape. Using a circular saw (set at a cutting depth of 1/4″ ) cut 1/4″ deep, by 1/4″ wide weep grooves across the bottom of the exterior base plates every 24″ along its entire length. This is a crucial step and will prevent the bale wall from trapping moisture.
- Attach the Exterior Base Plates to the Foundation Slab: As with the interior base plate installation, cut and position exterior base-plate sections so that they fit together at connections and corners. Then attach the plates to the concrete slab At this point, the waterproof membrane should be located over the top of the interior plate and under the exterior plate. This will prevent moisture from entering the house and ensure that it will drain outward and not be trapped within the wall.
- Cut and Fit Rigid Insulation: Cut strips of rigid insulation to fill the gap between the base plates. Use scraps of insulation from the foundation or other work if possible. It is best to place these small pieces of rigid insulation perpendicular to the base plates so that there will be numerous places to allow water to escape.
- Cover Any Exposed Plate Tops with Waterproof Membrane: Staple roofing felt (tarpaper) over the plates to prevent them from coming in contact with stucco. On the interior side of the plates, the felt should run just to the top edge of the wood channel assembly built to hold the electrical conduits. Make sure the felt covers only the wood plates and not the insulation between them.
- Traction Nails: Nail traction nails halfway into the base-plates as per above description.
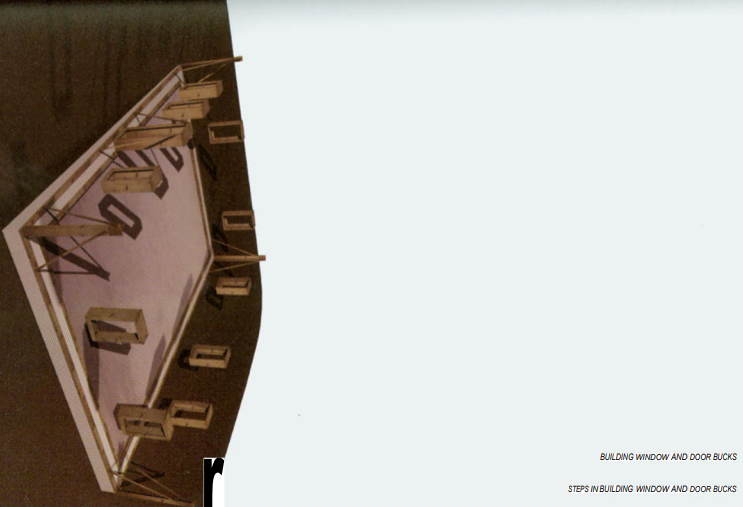
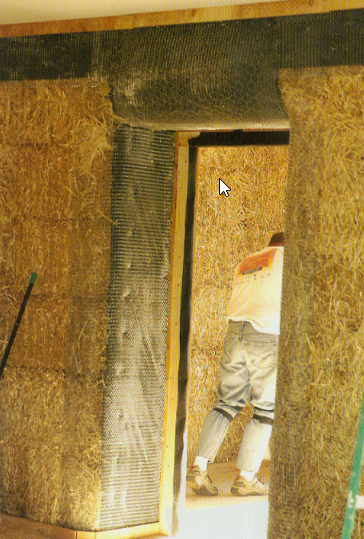
WINDOW AND DOOR BUCKS
Before you raise the bale wall, you will need to address several carpentry tasks. At each corner, attach a guide that is as high as the bale wall will be. These corner guides will assure that the wall is plumb and square to its foundation. Additionally, rigid wood door and window frames—known as “bucks”—should be constructed prior to the bale wall raising. Door bucks are erected along with the corner guides while window bucks are set aside for future use.

Corner guides are easily constructed by joining two straight boards (typically 2×6) of the same length together to make an L-shaped piece. Attach the bottom of one of these four L shaped pieces to the base plate at each corner, and then diagonally brace each on both sides making sure the corner guides are plumb. Since these guides will be taken down alter you complete the walls, be sure to use fastening techniques that facilitate easy removal.
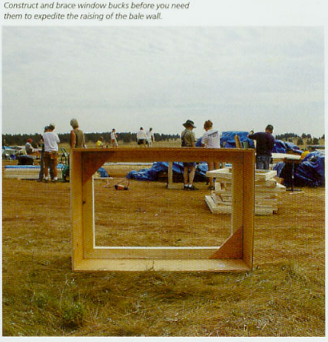
Window and door bucks are wood frames constructed of plywood and 2×4 lumber that provide sturdy openings in the bale wall as well as solid frames for the attachment of windows and doors. Structurally, bucks serve to protect doors and windows from expansion or movement of bale walls. Bucks float within the wall and transfer loads around the window and door frames to the wall and foundation.
When possible, windows and window bucks should be sized to the length of a bale to facilitate the straw bale wall building process. However, the size of salvaged, discounted or donated windows may not correspond to bale dimensions. In any case, each buck needs to be sized properly for the window or door assembly it will hold Window bucks are built and set aside until the bale wall reaches the window’s sill height- typically atop the second course of bales.
Install door bucks before any bales are stacked in the walls and attach them directly to the base plates. Both window and door bucks provide nailing surfaces for attaching lath around wall openings, and create strong frames for installing window and door units. These bucks also provide a place to attach stucco screeds, and any trim or millwork that surrounds such openings.
Steps for Building Window and Door Bucks
- Establish the Exact Sizing of the Windows and Doors to be Installed:
Verify rough opening dimensions for each window and door, and calculate the slightly larger buck dimensions according to the procedure outlined above. - Build the 2×4 Frames: Cut 2×4 frame pieces to the size of the buck dimensions and assemble the frames. Overlap
frame pieces when possible for added strength. Be sure that the frames are square when complete. - Rip 3/4″ Plywood Skirts: Cut plywood strips to skirt the 2×4 buck assemblies. Then cut these strips to length using the pre-built 2×4 frames as a guide.
- Screw or Nail Skirts to 2×4 Frames: Screw the plywood pieces to the outside of the 2×4 frame holding the plywood edge flush with the frame on one side (this side will be installed facing the exterior of the wall).
- Screw or Nail Skirt Corners Together: Fasten the free corners (those away from the 2×4 frame) together to add rigidity to the buck frames.
- Square and Install Temporary Bracing: Make sure the completed frames are square and then screw temporary bracing (scrap wood 1×4 or plywood) to keep the frame square until it is tied in to the bale wall.
- Store Bucks: Set the completed bucks aside for later installation within the bale wall.
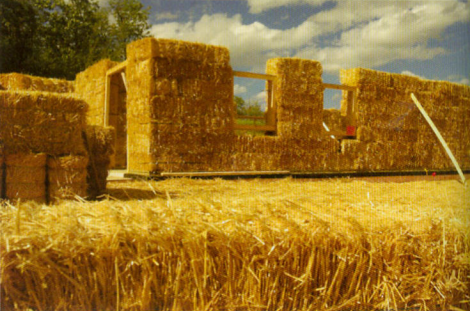
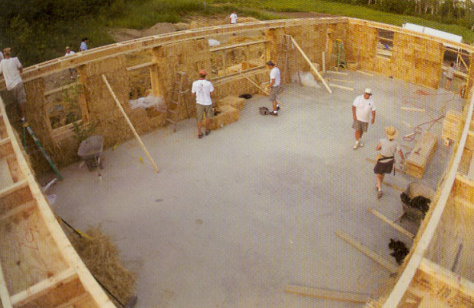
THE STRAW BALE WALL
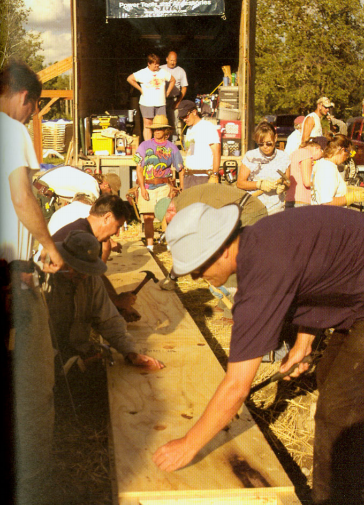
The straw bale wall is the heart of a Red Feather project and often the construction sequence that is least familiar to experienced builders. Bale building is very intuitive and lends itself easily to construction by groups of volunteers and community members. By adopting this fun and accessible technology, a motivated group of people can stack the walls of a home in less than two days. First bales of good quality must be sourced; then the community-friendly bale wall raising event may begin.
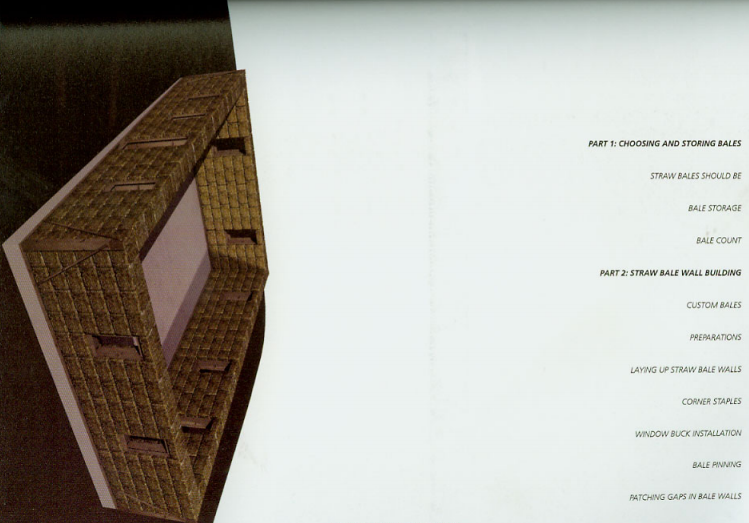
CHOOSING AND STORING BALES
For the load-bearing structure described in this handbook, the greater stability (from increased width) and higher compaction of three-string bales make them the best choice. These bales typically measure about 22″ wide by 15″ high by 48″ long. Be advised that some three-string baling machines produce bales that vary slightly in height, and that the length of the bales in any batch will probably vary by at least four inches. For projects in the Southwest, the wheat straw bales made by Navajo Agricultural Products Industries (NAPI) are an excellent choice. NAPI harvesters are very knowledgeable about the requirements of building-quality bales and typically have a large quantity of bales in dry storage. Other straws can also be used successfully, but as these have different properties from wheat or rice straw, you will need to do some research before considering them for use in building. First bales of good quality must be sourced then the community-friendly bale wall raising event may ensue. Like lumber, straw varies greatly in its quality and composition, but in straw bale construction there is nothing comparable to the timber industry’s method of visual grading Given the current absence of such standards, consider the following criteria in choosing your bales. Straw Bales should be well tied, pure, fresh and consistent.
STRAW BALE WALL BUILDING
After the RBA segments have been built and the base plates, the corner guides, and the door bucks have all been installed on the foundation, actual straw bale building can begin. Anyone who has played with LEGOs has a leg up on understanding the straw bale construction process. Basically a full bale functions as an 8-bump (rectangular) LEGO piece and a half bale as a 4-bump (square) piece. Any LEGO-savvy kid intuitively knows the difference between “stack bond” (bales stacked directly on top of each other) and “running bond” (staggered or overlapped bales). Whenever possible, stack the bales in your walls in running bond.
Laying up Straw Bale Walls
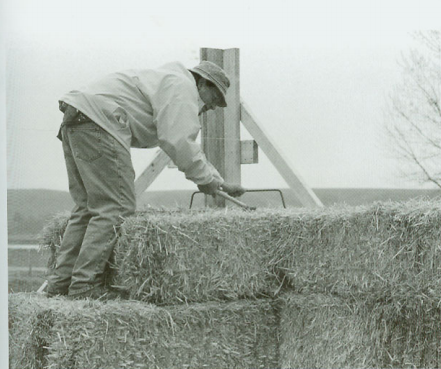
The placement of the first layer of bales (those that rest directly upon the base plates and are held in place by the traction nails that you’ve driven in partway) is most important The layout of the first course sets the pattern for the bales to follow. Care must be taken to insure that this first course lines up with the base plates and the foundation. If these first steps are done properly, the rest of the wall raising will go quickly and a better bale wall will result.
The first bales are placed at the corner guides and at the outside of the door buck assemblies. Line the bales up at the exterior edge of the base plates and continue working along the first course until it is complete. On load-bearing straw bale buildings, you should not push the bales tightly to the plywood face of the door bucks. Instead, leave a gap ol about 1″ for the bale wall to fill when it is compressed by the weight of the roof. Compression will expand the bales into this gap and any remaining gaps can be stuffed after the wall has fully compressed. The last bale in any wall section should be measured against the gap which it is meant to fill. It may fit perfectly, or it may need to be replaced by a smaller custom bale If the fit is close but not quite right you can take a measurement and search among your
supply (or your row of mini bales) for a bale that fills the gap, for a batch of bales usually varies considerably in length. Any remaining small gaps should be filled with straw flake, if a gap is larger than about 4″,move an adjacent bale half the gap distance and stuff the two resulting smaller gaps with loose straw.
Once your first course of bales is in place, give the wall a close inspection. Add straw to any gaps or depressions you find, and then lay the second course in running bond—that is, make sure each bale in the second course rests on two bales of the first course, bridging the seam between these bales.
Window bucks typically rest on top of the second course of a bale wall. So, referring to your drawings, measure off and then locate your pre-assembled window bucks on the second course after it is completed and checked. Red Feather also starts adding corner staples (see below) at this point, placing one staple per corner. You will need four corner staples for each course except for at the first course which is held firmly in place by the traction nails in the
base plates.
After you complete each course, jump up and down on the bales to “seat” them, and to compact the bale wall. It is helpful to attach a 4′ level to a straight 8′ long 2×4 in order to square and level the successive course of bales with the corner guides. Using a level to align bales as they are stacked upward will insure a straight and beautiful wall.
Corner Staples
Bend lengths of H 3 rebar to the shape of a large staple. The size of your corner staples will depend on the size of the bales involved. For a typical 3-string bale wall laid flat to achieve a wall thickness of about 24″, corner staples should be about 24″ wide with right-angle legs that can stick 10-12″ into the wall, so you will need to start with something close to a 4′ length. Use these corner staples to connect the two bales that make up each corner of a bale course, and reduce the likelihood they will be bumped out of position. Together wit! bale pins, corner staples add stability to the wall while it is being built, making it easier to walk on, and harder for a strong wind (or an RBA team) to knock it down.
Window Buck Installation
As mentioned above, window bucks are usually installed on top of the second course of bales. This depends on the window, of course, as small windows are sometimes placed high in the wall on the third or even the fourth course. A floor-to-ceiling window is also possible, but needs careful structural consideration. Once a window buck is in place, use shims as needed to level the bottom part of the buck. You should install a temporary brace to hold the buck safely in position until it is secured in the wall by pins or some alternative. The first bales of the third course are now placed at the corners and on both sides of the bucks leaving about a 1″ space (as with the door bucks) to allow for expansion.
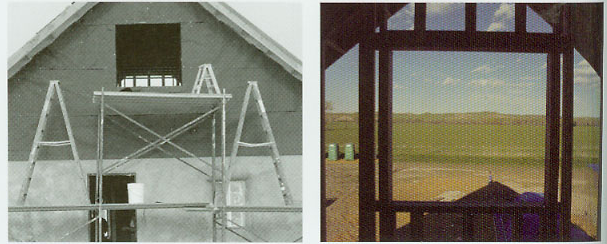
When the window bucks are completely surrounded by bales, hammer short pieces of rebar (8″-10″ long) through pre-drilled holes in the window buck thereby securing the buck to the wall. If the bales are very compact, it may be necessary to grind one end of these pins to a point. Do not drive the pin all the way through the hole in the buck. Leave a few inches of the pin visible. Once the RBA is in place and any final adjustments have been made to the bale walls, these pins can by pulled out (vise-grip pliers work well for this task) to allow for the final positioning of the buck within the opening. At this point, drive the pins into the bales again. For this final setting of the pins, drive them in so that only about A” of the pin is visible from the inside of the buck assembly. This will provide secure attachment. The end of the pin will be easily covered by the lath and stucco to come. As walls grow taller, Red Feather uses extra bales to build stepped scaffolding. By laying tiers of bales on top of one another, you can create good temporary platforms to stand on while you work. These straw bale work-platforms are useful for positioning the last few courses of bales, pinning the bales and window bucks, and installing the RBA atop the wall.
Bale Pinning
After the fourth course of bales is in place (and then again after the sixth and final course), Red Feather drives straight pins, approximately five feet in length, down through the bale wall for reinforcement. Using a sledgehammer, pound two pins into each top bale. As you will do this after completing both the fourth and sixth courses, the pins will overlap at midwall height. Such pinning makes the wall more stable during construction, and may offer structural benefits after the bale wall is fully loaded.
Various types of pins -bamboo, wooden surveyor’s stakes, saplings can be used; however, Red Feather typically uses high-recycled #4 rebar ends salvaged from reinforcing steel left over after building the foundation. After pinning the final course, you are ready to proceed to RBA installation, but first make a thorough inspection of the wall, patching gaps and seams with loose straw. Also at this time use a bale hammer to encourage protruding bales back into the plane of the bale wall.
Patching Gaps in Bale Walls
Even when much care is taken to make bales snug and straight, spaces between bales will occur, and will require attention. Add loose straw to gaps to assure a consistent layer of insulating straw throughout the bale wall Loose straw on the deck is a safety hazard, being both slippery and flammable. By periodically gathering the loose straw that falls out of the walls during the building process, you will have a constant supply of straw to stuff gaps between bales. Red Feather keeps a few large plastic garbage bags handy for this purpose. When the wall is complete, you will fit these same bags -again filled with loose straw—in the openings between the top of a window buck and the bottom face of an RBA to provide consistent insulation as well as backing for the lath that runs from the top of the bucks up to the RBA You must finish all straw stuffing before any lath is applied to the walls. It is important, however, to avoid overstuffing gaps, openings, and seams. Too much stuffing is as bad as not enough, and perhaps worse, because overstuffing can cause bulges that make applying lath difficult. Work toward an even, uniform surface with no big bulges or indentations (except for the occasional decorative niche) However, do not be too rigorous about creating a very flat wall, since part of the beauty of a straw bale wall comes from its picturesque surface irregularities.
Raising a bale wall is usually a satisfying and (if you are successful in gathering together some | helpers) a fast-moving experience. There is a danger, however, of losing all the work that | went into a bale wall; if rain gets to your bales, you will be doing another bale-raising after removing the soggy bales and purchasing replacements. So protect your wall from water at all cost Have tarps handy until you can build a good roof.
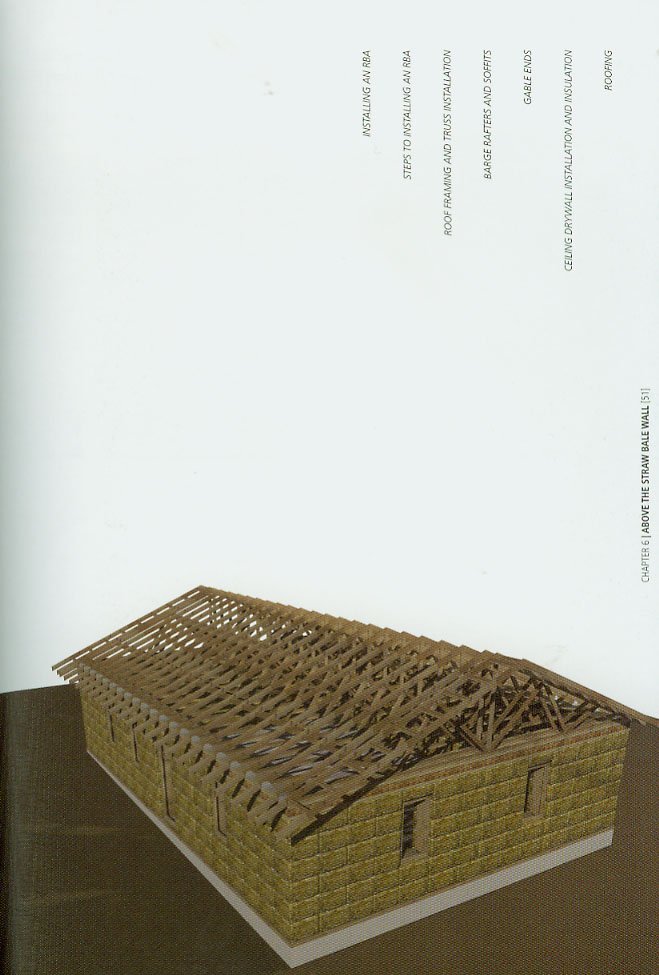
ABOVE THE STRAW BALE WALL
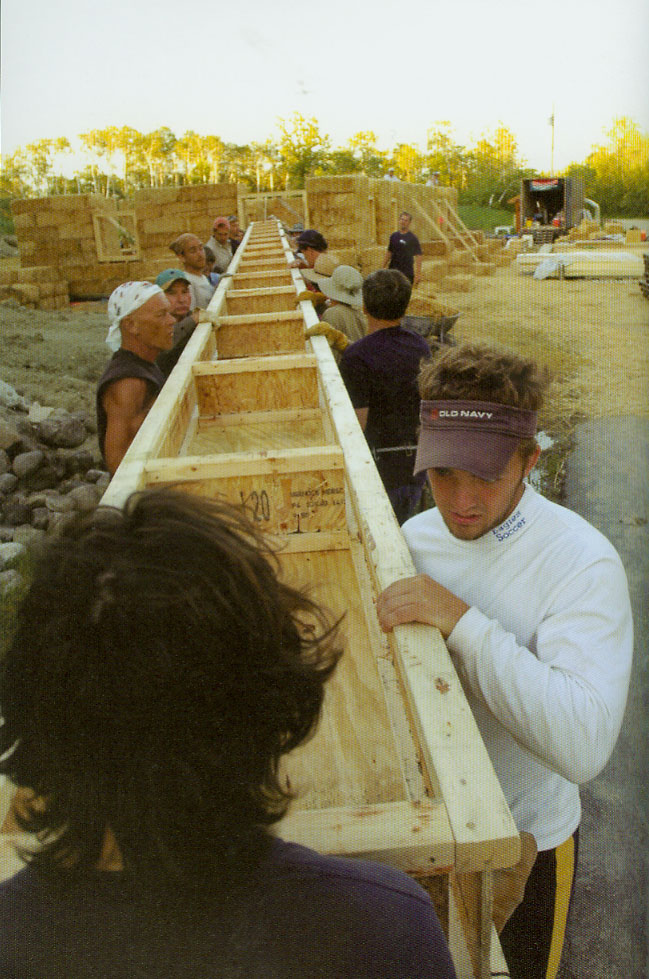
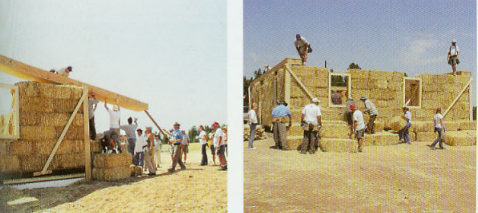
Installing a Roof Bearing Assembly is perhaps the most daunting and exciting part of a Red Feather project. Because of size and weight, you will need many able bodies and considerable cooperation to place pieces of the RBA on top of your bale wall. Given adequate preparations in terms of group organization and safety, this work will go quickly and safely and represents a very satisfying team-building exercise for all involved. Once the RBA is in place, the installation of trusses,gable-end framing, and roofing may begin
Installing an RBA
Since you have already constructed the sections of your RBA , you will not need much in the way of materials for this step. However, you will need a fair number of extra bales, since Red Feather typically makes a temporary, stair-type, straw bale scaffold beside one or more of the exterior walls. These bales provide a tiered work platform that can be easily moved from one wall to another, and will allow you and your friends to carry long RBA sections and place them on top of the wall. The more people you can round up to help you do this, the better.
Starting with one of the larger sections of your straw bale wall, position a few “wall walkers” atop the wall (preferably folks who are comfortable walking on top of the walls), and ask several other people to act as spotters. The number of spotters and walkers depends upon the size of the section being lifted and the strength and confidence of the spotters. There should be at least two people in each role, but several more may be required for larger RBA sections to insure coordination and safety. Each spotter needs to have a 2×4 about 10′ long to steer and push sections this way or that while they are being positioned. Those not fortunate enough to have drawn a better job get to carry the sections up the bale scaffold steps and lift them into place.
When a large number of people are working on installing an RBA, it is best to designate one spotter as the only person directing traffic. Early experiences with RBA raisings were reminiscent of a noisy group of Vikings trying to ram a castle gate open with a massive log. It is easy for everyone to get excited when moving objects of this size, but if folks get moving too quickly, safety will be compromised. In fact, it is possible to knock a bale wall down (and the people standing on top of it) with a runaway section. But if everyone works together under the calm direction of one lead spotter, each section can be walked up a ramp and slid carefully in place.
Once the sections are up and positioned, nail the corners together, and then install a pre-cut plywood L sheet at each corner.
Alter you have checked that the RBA as a whole is square and level, use it as a straight edge to align your bale walls. By walking along the top of the RBA and sighting down to the foundation line, you will be able to tell which bales are sticking out of line and need to be adjusted with a few strokes of a bale hammer.
To complete the RBA installation, use a long spade bit to drill through the bottom layer of the RBA plywood. After drilling, verify that the RBA and the bale wall are in alignment, and then pin the RBA to the top courses of the bale wall with a 3′ -0″ length of #4 rebar bent into a 4″ L at the end to keep it from going completely through the hole.
Steps to Installing an RBA
- Call Everyone Who Owes You a Favor: A big group of workers is invaluable for lifting bulky pieces of an RBA.
- Build Tiered Bale Scaffolding: Use straw bales to build steps up the outside of the bale wall section where you are installing an RBA section. When you are finished on one side, then reassemble the bale stairs on the other sides as needed.
- Assign Work Duties: Most of your work party will be carrying and lifting RBA sections, but assign several people as wall walkers and spotters. Also appoint a lead spotter who will be in charge of guiding the RBA team as you move large sections into position.
- Put the RBA Sections in Place:
Lift each pre-assembled portion of your RBA into position under the direction of the lead spotter. - Check Plumb and Level: Use a bale hammer or the side of a sledge hammer to position the RBA squarely above the foundation.
- Fasten Corners: Nail the corners of the RBA sections together.
- Fill Voids Fill: any voids in the corners of the RBA with loose straw insulation.
- Install Plywood L Sheets: With a square, a level, and persuasive tools, again verify that the RBA is as square and level as possible, and then, using pre-cut L-shaped sheets, fasten the RBA pieces together to form a rigid assembly that runs around the top of the bale walls.
- Align the Bale Walls: Use a bale hammer to adjust bales that stick out from the building’s interior and exterior. It is helpful to sight along the vertical plane made by the exterior edges of the foundation and the RBA in order to spot protruding bales.
- Pin the RBA to the Walls: When the RBA is fully square and in position, fasten it to the walls by hammering #4 rebar pins down through holes you have drilled in the RBA’s plywood panels.
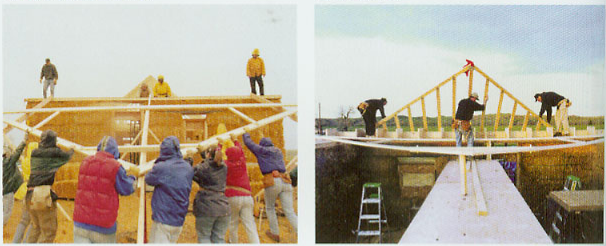
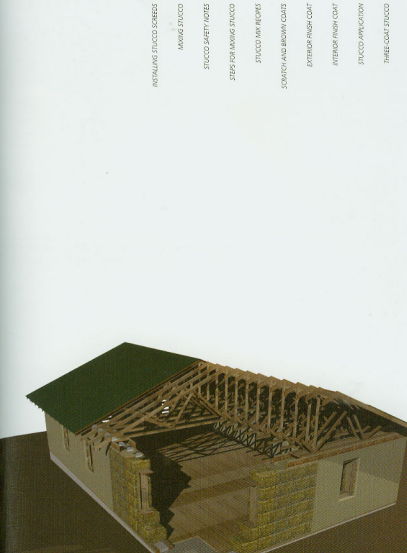
Roof Framing and Truss Installation
For a single-story, load-bearing bale home, trusses are a good idea for many reasons. First, they can be made with smaller dimensional lumber, allowing for a strong, lightweight roof system Second, the lumber used in wood trusses typically comes from smaller, second growth, or plantation timber sources. Finally, trussed roofs are quickly erected and cost effective. For straw bale buildings, where minimizing bale exposure to the elements is all important, a trussed roof is a good choice.
When working with trusses, use a team approach in moving large sections of material similar to the one you used in raising your RBA. For a simple building, the required roof trusses are quite manageable in weight and size.
Using bales for staging, and a lead spotter to direct traffic, a small group of people can quickly pass individual trusses to a couple of wall walkers on top of the RBA who, in turn, ran move along raising and bracing each truss. Use a “hurricane” clip at each side of each truss to connect it firmly to the RBA. These clips act against uplift and winds to hold the roof firmly to the building.
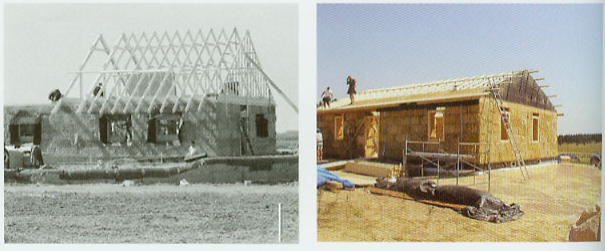
Barge Rafters and Soffits
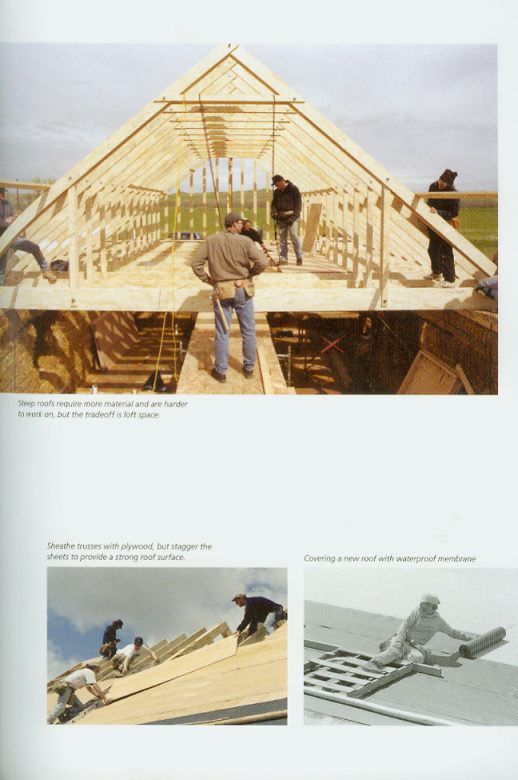
After the trusses have been raised and braced, you can begin framing the eave and gable overhangs. Install 2×4 lookouts (extensions to support barge rafters) to create eave overhangs at both gable ends of the building of at least 16″ On the eave overhangs, snap a chalk-line and then cut the rafters to length Install fascia trim around the butt ends of the rafter tails. Next, it’s time to sheath the roof with plywood. In the overhanging eave section, use material rated for exterior use if you chose an open soffit (an open under-eave area) design.
Gable Ends
Roof underlayment and finish roofing should be applied quickly to protect the building from the elements. While this is being done, frame the gable end walls. Typically Red Feather uses conventional wood framing within the gables Gable faces may be finished in a variety of ways. Board and batten or another type of exterior wood siding is a good choice. Corrugated metal is another durable option Stucco may also be applied on the gable ends. If you elect to apply stucco, an expansion joint channel should be installed at the top of the RBA to allow for the fact that straw bale walls and wood-framed gable ends expand and contract at different rates.
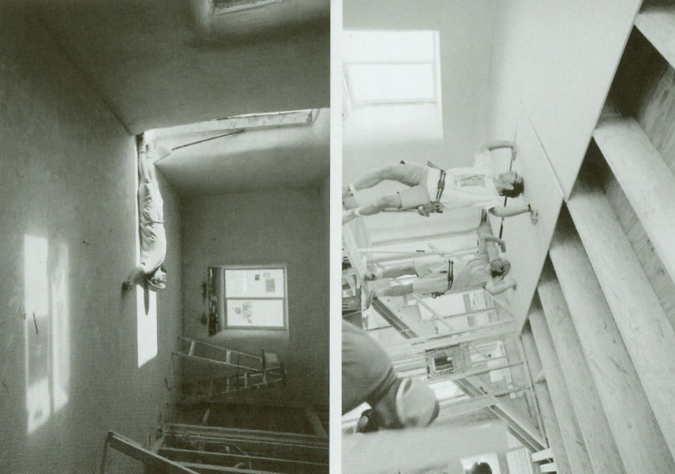
Ceiling Drywall Installation and Insulation
At this point it is necessary to install ceiling drywall to help compress the bale walls. You can make ceiling drywall installation easier if you learn several techniques for working with heavy, cumbersome sheets. As with other parts of straw bale construction, it is good to have a number of people around to help.
If your room size allows it, 12′ sheets result in less work and less material to purchase. Fewer drywall joints translate into less drywall tape and mud. Drywall lifts and pulley jacks on rollers, if available, make quick work of hanging ceilings if labor is sparse. Otherwise, construct a few “T-jacks”—that is, scrap lengths of 2×4 lumber shaped into a T such that the top of the T measures 5/8″ (the thickness of the drywall material) shorter than the floor to ceiling dimension. For example, a structure with an 8′-0″ finish ceiling height will require a T-jack that measures 7 -11 3/8”. One person with a T-jack can support a drywall sheet while others attach it to the ceiling framing with drywall screws. Red Feather uses 1 5/8″ standard drywall screws for 5/8″ drywall and 1 1/4″ standard drywall screws for 1/2″ drywall.
Your straw bale wall has very high insulation value, but you must insulate the roof if you want to ensure that the entire building envelope will be energy efficient and that your building will be comfortable. Once the ceiling is in place, put insulation between the rafters of the roof (if the attic will be heated) or between the members of the ceiling plane (if the attic will not be heated). Refer to local codes and climate information to determine what R-value insulation will be required. Red Feather typically uses fiberglass insulation “batts” placed horizontally in the ceiling plane, but many types of insulation are available. For example, good sustainable cotton insulation is manufactured from factory scraps of blue jean material.
Roofing
After you skin the trusses with plywood, and attach a layer of waterproof membrane to the roof, you are ready to install your roofing. It is important to put a good roof over straw bale walls, and to do so in a timely manner. As stressed before, you must keep water out of the bale walls. A quality roof, quickly built, ensures that your bales will be dry during construction and for the duration of their life.
The design of the roof – a simple gable structure with no valleys—is about as straightforward a roof as you can find. The roof’s simplicity is important for ease of construction and low cost. In straw bale construction it is important that roof design stay simple because complexities, valleys, and penetrations create opportunities for water leaks as well as rising costs. A roof must also have properly sized overhangs to protect bale walls from driving rain Overhangs should never be less than 16″—preferably 24″ and should be increased for buildings in rainy regions or for exposures where driven rain is expected.
Roof pitch is another issue you need to consider carefully. A roof must be sloped enough to shed water or snow effectively, but as a roof becomes steeper it also becomes more difficult and dangerous to work on. We choose a 6:12 slope (i.e., 6″ in rise for every 12″ of run) for many of our projects. This 6:12 is a sensible compromise between competing concerns: a roof should be steep enough to shed precipitation, yet not so steep as to be unsafe (especially if non-professionals are involved). A steeper 8:12 slope is also workable, and should be considered especially if you want an insulated attic space.
As for finish material, metal is the most advisable. A roof fabricated of galvanized steel is long lasting, provides durable protection in all conditions, is readily available in most areas, and, when you consider the life-cycle cost of the building, provides good value for the life of your home. Asphalt shingles of high quality are, if carefully installed, a less costly alternative. With asphalt roofing, however, you do not have the possibility of recycling the roof at the end of its life cycle, and your ability to harvest rainwater is diminished. Land fillsare full of asphalt roofing, but old metal roofs may find new life in future products. Red Feather also makes use of roofing with continuous ridge and eave vents, which eliminates the need for attic vents in the gable ends of the building. This means you will have fewer openings around which to lath and stucco, and will minimize the chance of leakage in the critical situation where you have gables above bale walls. Refer to regional venting codes to be sure that your venting area is sufficient. With a good metal roof in place, you hopefully will not need to worry about roofing for over fifty years.
The materials you add to your structure in this chapter add weight to the RBA and serve to compress the bale wall. When the wall is fully loaded with the combined weight of trusses, framing, sheathing, drywall, trim, and insulation, leave the walls overnight to compress as fully as possible.
The next morning, nail metal coil straps (produced by Simpson Strong-Tie or similar) to the exterior sides of the RBA and the base plates. Bolt the bottom end of each strap directly to the face of the foundation. On each side of the corner of your RBA. attach a metal coil strap and run it diagonally down to the base plate making sure it does not come closer than 12″ to a window or door opening. Coil straps should be placed at other points along the wall as per the design recommendations of a structural engineer. The straps are nailed through factory punched holes with fasteners per the manufacturer’s recommendation. These coil straps are very important, for they provide the direct structural connection from the RBA to the foundation. These straps are a defense against winds which could blow your roof off, and supply the major resistance your house will have to large uplift forces associated with major storms and earthquakes.
LATH
Straw bale walls go up quickly, and the experience is satisfying. Lathing, however, is time-intensive and tedious in comparison. In order to give stucco strength, especially for load-bearing straw bale structures, good lath work is vital. Thus, before you install lath, make sure that any wood you will be covering with lath is first sheathed with a layer of house wrap. Place this protective layer under the lath so it can protect wood items like window bucks from the water involved in applying stucco. You must also provide flashing at this point in order to channel moisture away from the interior of the wall.
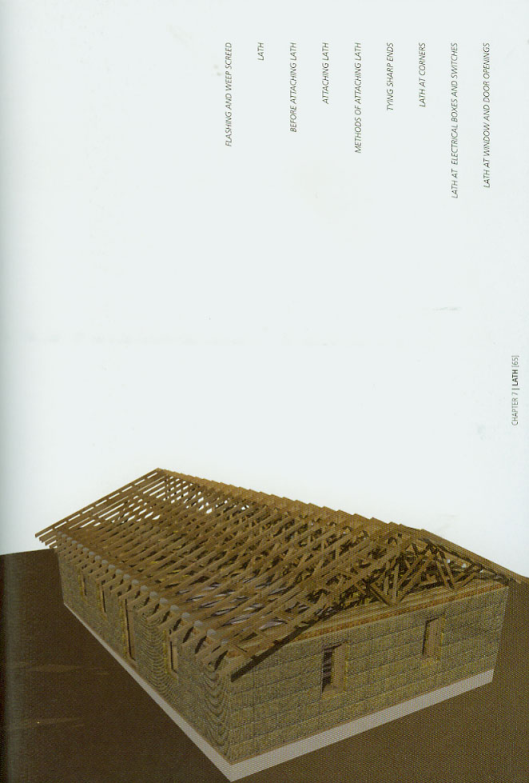
Flashing and Weep Screed
Begin by attaching a weep screed around the base of the building’s foundation, and metal flashing above all window and door openings. Red Feather uses commercially available channel shapes, and fastens them directly to the base plates where they meet the foundation. Weep screed is manufactured with weep holes in the screed trough that permit water to exit the bale wall. Weep screed also provides a convenient reference for cutting lath sheets. If you fasten these sheets so they terminate in the channel portion of the screed, then their sharp ends will terminate in a screed channel and will be out of the way of future trowel work.
Lath:
You must completely cover a bale wall with galvanized lath if the wall surface is to hold stucco. Red Feather uses expanded metal lath (also known as diamond lath) and common 20 gauge chicken wire. Diamond lath is used in areas that need more support, or will receive more wear—such as corners and window and door pockets—and horizontal ceiling areas like those above the windows that you will finish with stucco.
Before Attaching Lath
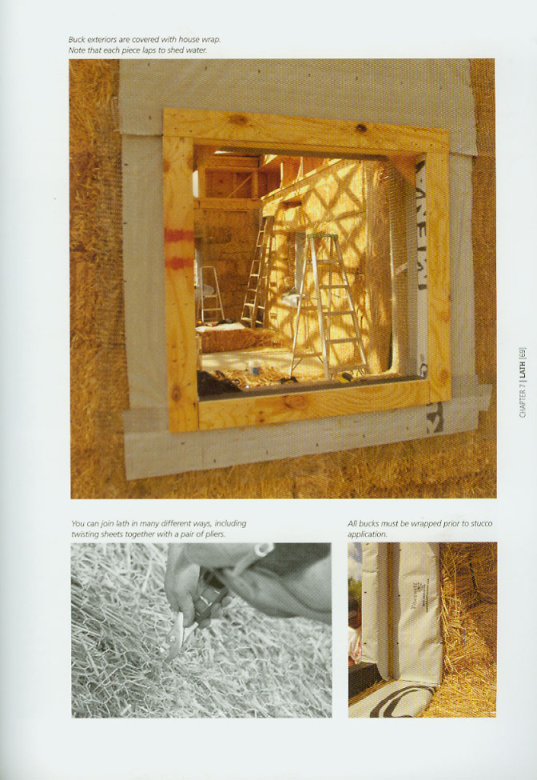
Before wrapping the bale walls in lath be sure to cover any wood portions of the structure—toe-up plates, door and window bucks, the RBA—with house wrap (such as Typar). Ideally this wrap should completely cover the wooden elements and be stapled between the buck and the bale wall. This layer protects wood assemblies from the stucco’s moisture. House wrap, however, does not hold stucco. Therefore, apply diamond lath, not chicken wire, over all protected wood surfaces.
Before covering the walls with lath, it is also a good idea to stuff straw in any remaining gaps or cracks between bales. Some straw stuffing will be necessary to fill gaps in the wall, around windows and doors, and especially at the connection points between RBA and walls and between floor plate and walls. The object is to fill empty gaps with straw not with stucco that will be applied later.
Attaching Lath
You must do a good job of putting lath up inside and out if you want your stucco application to progress smoothly. Your goal is to end up with a uniform layer of lath around the entire straw bale portion of your building without leaving any sharp edges or bits of wire sticking out that could catch a stucco trowel.
It is best to begin lath application on the flat field portions of your bale walls. Cover these 5 fields with vertically-run sheets of chicken wire that overlap by about eight inches. At the top and bottom of the wall, fasten the chicken wire to the base plate and to the face of the RBA with pneumatic staples. Red Feather typically orders sheets of diamond lath that are at least as long as the finished ceiling height, and pre-cuts wall-height sections of chicken wire from a roll so that we also have a ready supply of sheets on hand.
When attaching chicken wire sheets near wall corners, be mindful of the width of the diamond lath sheets you have stocked, because your next step will be to fasten sheets of diamond lath around door, window, and corner areas. Ideally leave about a foot of bare bale wall exposed between the edge of the chicken wire and the wall corner on each side. Then attach a single sheet of diamond lath, folded lengthwise, in the corner to provide a base for stucco. This sheet must overlap the chicken wire sheets adjacent to it. This practice saves lath material and time because it creates the fewest inter-sheet seams, and joins finished edges which are easier to stitch together.
If you stretch the chicken wire and diamond lath sheets tightly when stapling them to the base plates and RBA surfaces, your work will go more quickly since tight sheets require less tuning later.
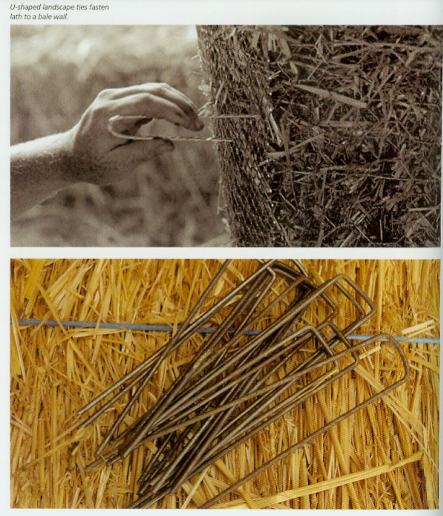
Methods of Attaching Lath
To fasten lath sheets to straw bales, use galvanized landscape pins. Use galvanized pneumatic staples, however, to fasten lath sheets to wood components such as plates, RBA surfaces, and window and door bucks. The best fasteners for attaching lath to wood are galvanized roofing nails for they are designed to seal themselves to a waterproof membrane and thus make fewer holes which could admit water. Staples are typically faster than roofing nails, however, but whatever fasteners you use, be sure not to puncture the waterproofing membranes any more than necessary during lath installation. In the interest of exercising some quality control during lath work, it is a good idea to have someone with experience insure that the lath is being properly installed. A tight fit to the bales is preferred Ideally, the lath should not be able to be pulled away from the bale. Take care, though, to avoid over-tightening since this may unwind the lath itself or pull it from its point of attachment
Tying Sharp Ends
The process of tying sheets of lath together—both chicken wire and diamond lath is comparable to making a quilt out of different pieces of fabric And, as in quilt work, this “tying together” is the most onerous part of lath work.
5 There are many ways to sew lath together A paint-can opener, a screwdriver, a good set of pliers, and tough gloves are some of the tools Red Feather uses The trick is to bend and twist enough individual wires from the edge of one lath sheet over in such a way that the sheet becomes firmly attached -sewn—to its neighbor sheet In terms of finish, the main objective is to turn the sharp ends of all wires used for joining sheets back toward the bale wall so as not to create trowel-catching obstacles Landscape pins are used about every 16″ on seams and elsewhere as needed.
A given sheet of lath will either have a site-cut rough edge, with plenty of loose wire ends that can be used to tie lath sheets together; or a factory-finished edge with no such ends Therefore there are essentially three edge conditions to consider when joining two sheets of lath: 1) joining a finished edge lath sheet to a rough edged lath sheet, 2) joining two rough edged sheets together, and 3) joining two finished edges together. In the first two cases, when you have at least one lath sheet with loose edge wires available for sewing, you can join the two sheets using these wires and the tools mentioned above. When you are joining two sheets of finished-edge lath, another method may be employed. You can either make use of lengths of wire from a spool to link the sheets together (it is also a good idea to have a spool of baling wire on hand for areas where you will need longer pieces of thread, or you may cut into one of the finished edges to provide wire ends as required to sew the lath sheets together. For example, in order to fasten one finished-edge sheet of chicken wire to another fmished-edged sheet, you can use wire cutters to snip into the edge of the chicken wire every six inches or so, and use the resulting loose ends to tie the sheet to its neighbor. You should also use landscape pins on such seams to help with the overall task of bending sharp ends back into the mass of the bale wall as well. In order to tighten a panel of lath that is too loose, take a pair of needle-nose pliers and go along twisting the slack out of the lath field at regular intervals.
Lath at Corners
At interior and exterior corners you should apply full-width sheets of diamond lath. If care has been taken to attach chicken wire so that a sheet of diamond lath will overlap the chicken wire on each side of the corner, you will save yourself a great deal of patching and splicing. Do not fold these corner sheets if a rounded corner is desired. After securing the corner lath strip with staples at the top and bottom of the wall, sew and pin each vertical edge of the diamond lath corner sheet to the chicken wire sheets already on the walls. Then proceed with tightening the corner lath areas as you did on the walls.
Lath at Electrical Outlet Boxes and Switches
Another important use of diamond lath is to cover areas around electrical switches, plugs, x and other fixtures that you will flush-mount in the bale wall. In such cases, small rectangles of diamond lath are cut 2-3″ larger than a given electrical box in both directions. With a marker trace the box onto the lath and then mark an X from the corners of the box. By cutting on the lines of the X down to the size of the box, and then folding back the resulting triangles of lath, an open-sided box of bent lath can be made to fit snugly around an electrical outlet box. With its lath surround, an electrical box can then be set in a socket in the wall, landscape pinned in place, and then tied into the field lath of the bale wall.
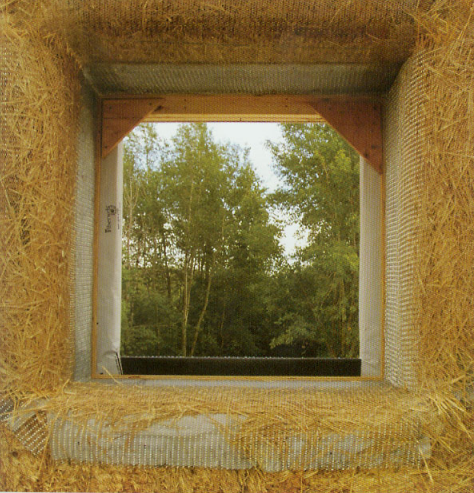
Lath at Window and Door Openings
You must devote a great deal of attention and time to providing good lath coverage around your window and door openings. Since the buck assemblies for these openings are constructed of plywood, they must be protected from wet stucco. Once house wrap has been affixed over all wood areas, lath can be added. The process is as follows: Apply house wrap and/or waterproof membrane to all interior buck surfaces, extending it inward so as to cover the edge of the plywood and. outward fastening it between the exterior of the buck and the bale wall itself. Cut a sheet of chicken wire to the size of the opening where you are working.
Wrap this sheet over the corner formed by the bare straw bale wall and the inside plywood face of a window or door buck and attach it with staples. Beginning inside the buck, secure and
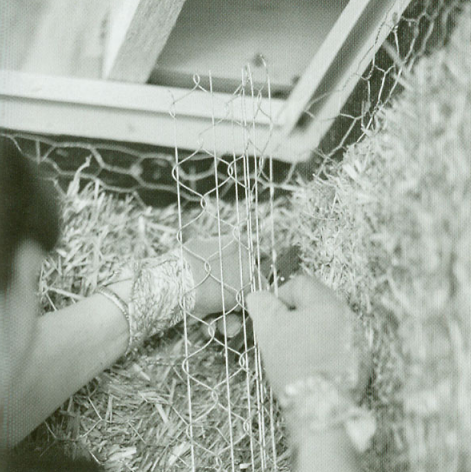
the window frame (you will need to fold it slightly to get it back into the corner of the buck assembly) and staple it to the interior of the buck; then splay out the other end and staple it to the RBA where possible and then sew it to the chicken wire on the bale wall. The flexible nature of the diamond lath allows you to make clean curved transitions where the corners of the window head (or sill) meet the walls.
Apply another layer of chicken wire from the inside top of the buck (near the top of the window frame) back to the RBA. This provides a double layer of chicken wire over the waterproof membrane protecting the top of the buck. Then apply diamond lath to all interior faces of the buck and stretch it around to meet the bale wall where you can landscape pin and sew it into the lath field. Once the layers of chicken wire have been covered with diamond lath, they will provide space for the stucco to engage in the lath. This process provides better adhesion for the stucco on the overhanging flat surface above openings.
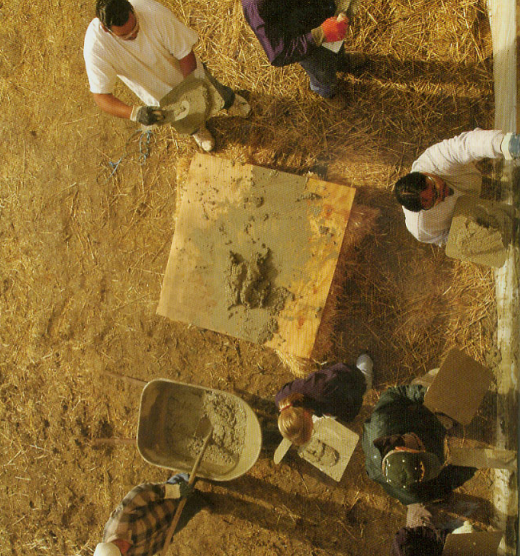
STUCCO
Stucco application is a wonderful group activity that can be shared and enjoyed by elders and kids alike. With an enthusiastic crew, stucco application is quick and satisfying, producing a beautiful textured wall that will protect
the bale wall from pests, moisture, and fire while adding structural strength. Since labor typically costs more than materials for housing built in the United States, a group of people working together to build, lath, and finally stucco
a straw bale wall can significantly lower the cost of a home.
Installing Stucco Screeds
The first step is to install screeds—a screed is a piece of material that provides a guide, like a small dam, which tells you how deep you have applied stucco when you can no longer see the lath substrate. On a building’s exterior, Red Feather fastens commercially available metal screed products to the RBA and to the base plates to define the edge of stucco coverage al the top and bottom of the wall. Within a building, Red Feather uses strips of plywood ripped from scraps as screed boards. Your objective is to install these plywood screed strips wherever a stucco wall shares an edge with a finished, flat surface The screeds are applied flat, using either screws or pneumatic staples, with one edge pressed to the flat surface of the floor, ceiling, or a buck frame depending on the situation
Note: The top interior edge of the base plate, or simply a piece of J-mold held 1/8″ off the finish floor, (described in Chapter 3) acts as the screed strip for the base of your interior walls. At the ceiling a continuous line of screed strips is fastened to the top of the RBA to transition between the stucco wall and the finished drywall ceiling. This 3″ or 4″ band of plywood screed around the top of the interior walls will provide an upper boundary to terminate the stucco wall coats, and a margin of protection against the wet stucco damaging the ceiling drywall installation. Also use screed boards ripped from scrap plywood to frame the inside of window and door bucks. Cut these to the desired thickness of the stucco and apply them to inside corners where the 2×4 window frame and the plywood skirt of the bucks meet.
Make sure to push these screed boards up flush to the window frame; they will keep stucco from touching the clean edges of the window and door assemblies. In both cases, screed assemblies serve as an attachment point for interior trim, whether it be baseboard, cornice trim at the ceiling, or finish trim around door and window frames.
Note: An experienced design professional should detail and inspect screeds and flashing at window and door rough openings. Be sure that experienced professionals install metal exterior screeds. For example, the weep screed at the bottom of exterior walls must lap over the top of the foundation wall by at least one inch in shingled, weather-shedding fashion. Flashing products only keep water out of the building when they are properly installed. Mixing Stucco
The first task is to prepare a mixture of wet stucco. You will need a specialized group of tools, and a few hard working helpers to do the mixing. Tools for this step are described in some detail because conventional stucco mixing and application techniques must be slightly modified for straw bale construction Also, in conventional construction, stucco is often sprayed onto wall surfaces. This may be considered for straw bale projects, but Red Feather uses large work groups to apply it by hand We feel that this method is safer for lessexperienced workers, and it reduces overall costs for volunteer-based projects. To prepare stucco, ensure that an experienced person someone fully knowledgeable about straw bale stucco application—is available to lead the stucco team This lead mixer should have a team of at least four people. Three will shovel, measure, and prepare materials (sand, cement, lime, etc.) at the mixing site, and may help to move mixed stucco to the project walls in wheelbarrows. One will oversee the quality and quantity of the stucco being used on the walls, and communicate stucco demand and quality control issues back to the mixing loam
Any additional workers should be added to those on the wheelbarrow detail. Locate mixing equipment and supplies on level ground free of overhead obstructions in close proximity to the building project. Organize this work area to facilitate the free flow of sr wheelbarrow traffic. Most importantly, create an unobstructed path for full wheelbarrows—
often weighing as much as 90-100 pounds—to move between mixer and building. Also B, make sure the incoming-materials path does not cross the outgoing wheelbarrow path. Two team members should work together to empty the heavy bags of cement into the mixer It is best to create a short platform on which to rest the bags while one pours their contents into the mixing drum. This will prevent waste, and will help keep the mix accurate.
Steps for Mixing Stucco
- Select an appropriate site for the mixing station.
- Assign team member duties and review stucco safety issues.
- Post a copy of the stucco recipe at the mixing station.
- Review stucco process and recipe with work team.
- Check the mixer engine for gas and oil.
- Check site for proper location of materials and pattern of work flow.
- Attach water hose and gather necessary wheelbarrows, buckets, and shovels.
- Fill water buckets to proper levels as indicated by the recipe.
- Start mixer.
- Add required amount of water.
- Add about half of the sand.
- Add Portland cement.
- Add lime.
- Add remainder of sand.
- If necessary, add additional water until desired consistency is met.
- Add fibers (if used) per manufacturer’s instructions.
- Mix 3-5 minutes after all ingredients have been added.
- Dump mixed stucco into wheelbarrows and transport it to the building site.
- Add water immediately after you empty it. This prevents stucco from drying out on the inside before you make the next load. Use a rubber hammer on the outside of the mixer drum to loosen clumps of stucco stuck to the inside.
- Repeat the entire process. Help workers anticipate material and water needs for subsequent batches.
Note: There will be times when you will need to adjust the quantity of water, fiber, sand, and lime in order to produce a “wetter” or “dryer” mix. The mix supervisor will be able to see how fast or slow the application is going and what type of mix will be needed to keep the stucco work process smooth.
Stucco Mix Recipes
In practice a batch of stucco from a typical mixer covers approximately 80 square feet for a scratch coat, and a somewhat larger area for brown and finish coats (see below). It is helpful to measure materials by volume. To do this you can mark containers with fill lines. It may also be helpful to translate the part ratios listed below into other measures: bags of Portland cement, shovels of sand, 5 gallon buckets of water, and so forth.
Scratch and Brown Coats
Mix:
1/4 (to a maximum of 1/2) part type-S lime
I part Portland cement
3-4 parts masonry sand
Water as required to achieve workability—that is, a consistently moist mixture that will keep its shape on a trowel.
Optional: fibers per manufacturer’s recommendations
Note: If it is necessary to adjust the mix for workability, add water, sand, or cement. Do not add more lime than listed above. Use as little water as required for a workable mix. Water should be minimized because excessive water decreases the strength of the finished stucco, and may cause cracking.
| Exterior Finish Coat | Interior Finish Coat |
| Mix J 1-2 parts type-S lime 1/2 part White Portland cement 1/2 part Portland cement 3 parts silica sand (grade 20) Water as required to achieve workability Color admixture per manufacturer’s instructions | Mix: 1-86-872 parts of type-S lime 1 part White Portland cement 3 parts silica sand (grade 20) Water as required to achieve workability Color admixture per manufacturer’s instructions |
Stucco Application
During stucco application, Red Feather uses straw bales in a variety of ways. II is very useful to set pieces of scrap plywood on top of straw bales or saw horses to make improvised tables where stucco, unloaded from the heelbarrows, will be easily accessible to those applying it to the bale walls. However, stucco awaiting use on the tables may need to be moistened (tempered) to keep it workable.
Note: Do not temper the mix more than once. Also do not apply any stucco that has been out of the mixer for more than V/2 hours; such stucco should be discarded.
When applying stucco to the exterior walls, straw bale scaffolding will prove very useful, so it is best to leave portions of the scaffolding in place after you complete your lath work. While applying interior stucco, it is helpful to place loose straw at the base ol the walls to catch falling bits of stucco. Remove this straw periodically to keep the floors dry and clean.
A hock and trowel are the primary tools you will use to apply stucco, and rounded trowels (also known as “pool” trowels for their typical use in swimming pool construction) are better suited to straw bale stuccowork than trowels with sharp corners. Pool trowels are able to create the gradual contours and corners natural to straw bale buildings. Similarly, sponge trowels are better than hard trowels for smoothing brown and finish coats, since they are able to handle the surface irregularities of bale walls.
To apply stucco on a wall surface, start with a hock in one hand, and a trowel in the other From the stucco table scoop up a portion of stucco with your trowel and drop it on the hock. Approach the wall, tilting your hock forward as you move in. Push the hock firmly against the wall in an upward manner, pressing stucco firmly through the lath layer and into the straw bales (or into the scratch-coat grooves, if you are applying a brown coat). Now use your trowel to smooth out irregularities and insure a continuous surface. Do not spend too much time fiddling with the stucco, that will come later; at this point the object is to get stucco on the wall. Work from the bottom of the wall to the screed at the top. Then, using your trowel in big sweeping curves, smooth the stucco evenly. You will have to practice with the tilt of your trowel to avoid digging in, but you will soon find the correct motion This is the most efficient and roductive way to apply stucco, but truthfully there are many workable techniques. Stucco is forgiving and you have a fair amount of time to correct mistakes while the stucco remains wet and pliable. Do your best to get the stucco pushed well into the wall surface and try to limit material waste. You will find your stucco rhythm with a bit of practice
INTERIOR WALLS
After you have given your straw bale walls their stucco coatings, it is time to set to work finishing the inside of your home. The perimeter bale walls of a straw bale house are typically covered with stucco, but the interior walls are
often made of less bulky materials. Since the interior walls are not structural they may be located nearly anywhere. Material choice for interior walls is another personal decision. Will you build with conventional drywall or use
one of the many agricultural byproduct materials now available?
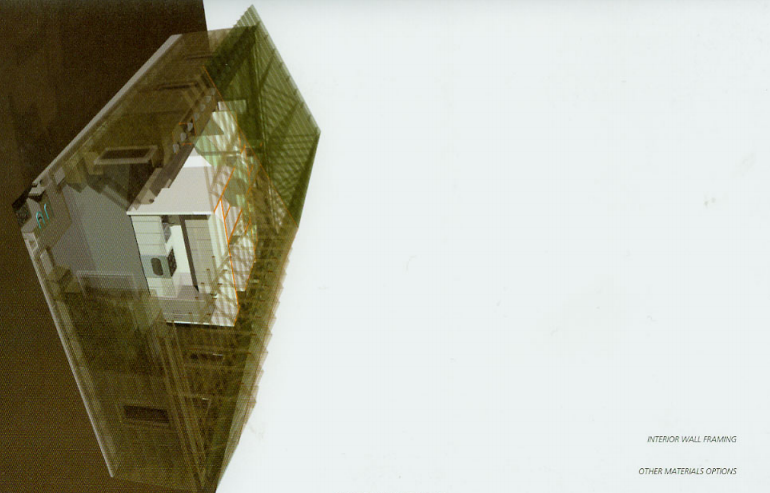
Interior Wall Framing
To partition interior spaces, construct stud-framed interior walls on the interior plates you will have laid out on the foundation. We recommend placing most of the electrical work and essentially all of the plumbing work within the interior walls. Keeping these systems out of the exterior bale walls facilitates change;it also reduces the likelihood of water leakage or fires within your straw bale walls.
You can use conventional 2×4 studs to build interior partitions. Try to select Forest Stewardship Council (FSC) certified lumber if it is available. Red Feather typically uses drywall over typical wood framing for most of the interior walls, but there are also good alternatives. Drywall has the advantage of being widely available, fire-resistant, and relatively benign from an environmental perspective. Stucco may also be applied over lath on a stud wall frame. Several straw bale homes have been built with conventionally framed interior walls that were subsequently stuffed with straw, lathed and coated with stucco to give a surface finish more in keeping with the aesthetic of the straw bale exterior walls
Where a 2×4 framed wall meets the bale wall a solid connection needs to be made. The
RBA and base plate components of the load-bearing straw bale wall system provide good
surfaces for tight connections. Simply fasten the end stud of a conventionally constructed
wall section to the top and bottom of the wall. If you desire a positive connection along the
full height of the wall, you can key a 2×4 into the bale wall before applying lath and stucco in
order to provide a continuous nailing surface.
Other Materials Options
Straw products: Straw bales are typically too thick to be used for interior walls; however, a bale wall between your building and a future addition would give you a handsome deep doorway, privacy, and good thermal and acoustic separation. Other options for interior walls include agricultual byproduct panels on a stud-framed wall system and post-agricultural building systems that provide their own support. Compressed “ag-bcard” materials—made
from compressed straw and/or seed hulls—make great companions for straw bale exterior walls (available from PrimeBoard Inc., North Dakota). These ag-boards are typically fastened to conventional stud-framed walls (made up of Forest Stewardship Council Certified lumber whenever possible). Self-supporting compressed-straw panel systems are available in several formats as well: a paper-faced compressed straw panel (Affordable Building Systems, Texas)
makes good interior walls. Straw-insulated structural panels are also available for taller walls and walls that need more strength (Agriboard,Texas). There are also dimensionally stable compressed straw bale blocks to consider (O-blocks by Oryzatech, California).The leaner dimensions of these products make them ideal for interior partitions or for projects in regions where super-insulation is not required. Adobe or Brick thermal-mass walls should also be considered, especially in colder climates, g When brick, stone, or adobe interior walls surround a fireplace or stove—or when you locate thermal-mass interior walls to absorb direct sunlight—such walls work well to store the day’s | heat and stabilize indoor temperatures during cold winter nights.
Note: Professional electricians and plumbers should be engaged to perform all electrical | and plumbing work. Any information provided in this handbook related to these systems is meant to assist professional tradespeople who may be unfamiliar with how their work is handled in the context of a straw bale building.
FINISH DETAILS
The detailing possibilities for a straw bale building are nearly limitless. Design decisions concerning the shape of wood trim and moldings, the texture of stucco finishes, the color of paints and stains, and the inclusion of built-in straw bale features like benches, niches, and “truth windows” define the unique personality and beauty of each house. Decisions involving finish details are also an important way to involve less experienced builders in the construction process. At this stage of projects. Red Feather has also been able to enlist community artists in adding mosaics, murals, and wall relief sculptures that give character and beauty to a straw bale building.
Wood Trim and Moldings
Red Feather typically uses a simple band of 1×4 cedar for trim. Cedar is attractive whether left natural or covered with paint or stain. Cedar also resists decay, so exterior applications hold up well. Red Feather installs cedar trim around door and window frames, and along the floor as a baseboard. This application of trim covers the joints between the flat surfaces of floor, window, and door assemblies and the organic planes of the straw bale wall. Trim may be omitted if you take care to do good lath and stucco work at every transition point in your building. If you take this option, you can install a metal screed molding (for example a J-mold) around window and door frames, and wherever else the bale wall meets the ceiling and floor. Also be on the lookout for salvaged wood or other items that you could use in the course of the project. Using salvage for trim and other applications lowers costs as well as demand on tree-based resources. Moreover, old elements in a building add to its character and aesthetic appeal. For exterior trim a durable and weather resistant material like cedar is best.
Exterior applications include: window and door trim, decks and patios, roof trim (at both fascia and soffit), and accent trim such as band and skirt-boards (i.e.. trim at the top and bottom of the exterior wall). When adding exterior trim, keep gravity and the flow path of water in mind. Think where you do not want water to go—inside the bales, windows, and doors— and how you can “head it off at the pass.” For example, Red Feather applies a 1×4 trim to the exterior of windows and doors. Your objective, here as elsewhere, is to create a trim design that sheds water. You also will want to install a drip cap (a commercially available metal flashing section) on top of the trim, and a sloped sill (or no sill) at the bottom of each exterior opening. When installing exterior trim, apply a generous amount of quality sealant (one that will remain flexible through the wide range of temperatures your building will experience) to its back to insure a tight seal with the wall surface. You may find that you will need to scribe the back of the trim in the event it has a wavy surface. Attach exterior trim material with corrosion-resistant fasteners such as galvanized screws or nails. Follow the same steps to trim and seal around doors.
Window and Door Installation
Window installation (as opposed to the installation of window bucks, which you have already done) takes place after you have finished applying exterior stucco and color coats. Simply place the window in the opening, shim it slightly off the rough sill, fasten one corner to the buck and then level and plumb the window assembly. Fasten the rest of the window frame to the screed boards already in place within the window bucks. The window should end up flush with the building exterior and in this way eliminate exposed sills that could collect and trap water.
Install doors in a similar fashion. Bear in mind that you should make an effort to center window and door assemblies as perfectly as possible within the frame of the buck. This facilitates interior trim application, and improves the appearance of the windows and doors once they have been finished and trimmed.
Stucco Texture and Color
The choices you make in surfacing and coloring your stucco provide opportunities to personalize your straw bale walls.In a straw bale home, the entire wall surface literally becomes structural, and during the final stucco coat you can use different textures and colors to achieve a desired aesthetic effect. If you wish, you can add color to the final coat of | stucco that you apply to the wall, as opposed to simply applying a surface coat of color to a s stucco wall. This integrates the color into the wall, and makes the color more durable. A wide variety of stucco textures are possible for interior walls; on exterior walls, however, stucco texture should be as smooth (or as minimal) as possible in order to guard against moisture infiltration. A final (or third) color-impregnated elastomeric coating may be used over your
stucco walls.
Truth Windows
A tradition in recent straw bale buildings is to build a “truth window” at a special place in the building’s interior, since once your straw bale project is complete, it will be difficult to tel that the walls are actually composed of straw bales. Visitors see an attractive, thick-walled
building, but they will most likely assume that you built it out of masonry or adobe as only
stucco will be visible. In response to this, straw bale builders often incorporate a framed
opening that shows a portion of the straw within a bale wall—a truth window. Such a
window represents yet another way of personalizing your building, and telling the secret of
its warmth, coziness, and structural composition. A truth window says: “This house is built
of straw.”