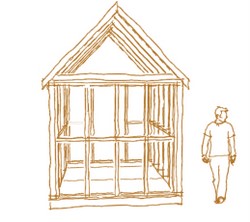
The shed roof truss design is one of the most important features of the shed you are building. The sturdiness of the roof is vitally important to the success or failure of the structure that protects your belongings from weather damage and disaster.
There is one common shed roof truss design that is used for nearly all sheds. It is easy to use and build, and can be done by anyone that has at least some knowledge of framing or carpentry.
The Common Shed Roof Truss Design

This shed roof truss design will be made up of two rafters that hold up the structure of the roof. When they are completed, the trusses are lifted up on top of the frame of the shed structure. How many trusses you need in your shed roof truss design depends on how long the shed will be. The longer the shed, the more trusses you will need in your shed roof truss design.
How to design a shed roof truss
The shed roof truss design is very easy to follow, and you can easily build your own trusses. Your first step in creating your shed roof truss design is to measure the slope of the roof. This measurement determines the length of the rafters. If one side of the shed has a longer slope than the other, then one of the rafters will be longer than the other. Decide on the number of roof trusses you will need in your shed roof truss design. Then double this number to determine how many rafters you will need. It can be helpful to develop a sketch of your shed roof truss design complete with measurements prior to building.
Building the Shed Roof Trusses
Once your shed roof truss design is complete you are ready to go shopping for materials. You will need two by four pieces of wood for each rafter. You will also need long wood screws, a screw gun, half inch pieces of plywood, one by three pieces of wood, wood glue, nails and a hammer.
Cut each piece of wood to the length you need, finishing it off with a forty five degree angle at the top. This is called a plumb cut. Next make a cut for the bottom of the truss, called the bottom cord. This section connects the two rafters at the bottom. They receive a forty five degree angle cut on both ends. Next you are ready to create the gussets. The gussets are half inch thick pieces of plywood that covers three ends of the trusses. You need a total of six gussets for each side of the truss.
Once all your cuts are made you can begin assembling the truss. It is best to do this on the ground, following your shed roof truss design, before lifting it up onto the frame of the shed. Use end blocks and stop blocks of one by three wood to make sure that the rafters and bottom cord fit together. With everything firmly in place you can begin attaching the pieces with nails, screws and wood glue.
