When you start Tekla Structures, a new window appears on the screen. The following illustration identifies the various areas of the Tekla Structures Model Editor window: |
|||
m) Status bar displays the prompt and the status of some settings (2J Snap settings control which points you can snap to and pick f3J Select switches determine selectable objects f4J Pull-down menus contain all commands f5J Steel beams, columns, plates (6J Concrete footings, beams, columns f7J Commands for creating views fsj Toolbars can either be docked or floating Initially, most of the menu options and all the icons are gray indicating that they are inactive. When you open or create a model, the icons and available menu options will become active. |
|||||
Screen components | |||||
Menu bar | This section briefly describes several important screen components. The menu bar located under the blue title bar has pull-down menus containing all the Tekla Structures commands. To select a command, click a menu title and then select the command. The toolbars are located under the menu bar. They contain icons which give easy access to the most frequently-used commands. To execute a command, click the appropriate icon. Use the icon as an alternative to selecting commands from a pull-down menu. When you move the mouse pointer over an icon, a tooltip displays the name of the icon: |
||||
Toolbars | |||||
Tooltips | |||||
■5 | If the enhanced tooltips are switched on, the tooltips are not displayed. The enhanced tooltips are switched on by default. | ||||
Enhanced tooltips | The enhanced tooltips give more information about the command and how it can be executed. They also give examples, hints and tips: | ||||
The two circled pairs of switches control whether you can select: | ||
• Components or objects created by components, or • assemblies or objects in assemblies. You need to activate snap switches to pick different positions and points, e.g. line ends and intersections. |
||
The two circled switches define whether you can pick reference points or any other points on objects, e.g. part corners. Either or both of these switches must be active for the other switches to work. 
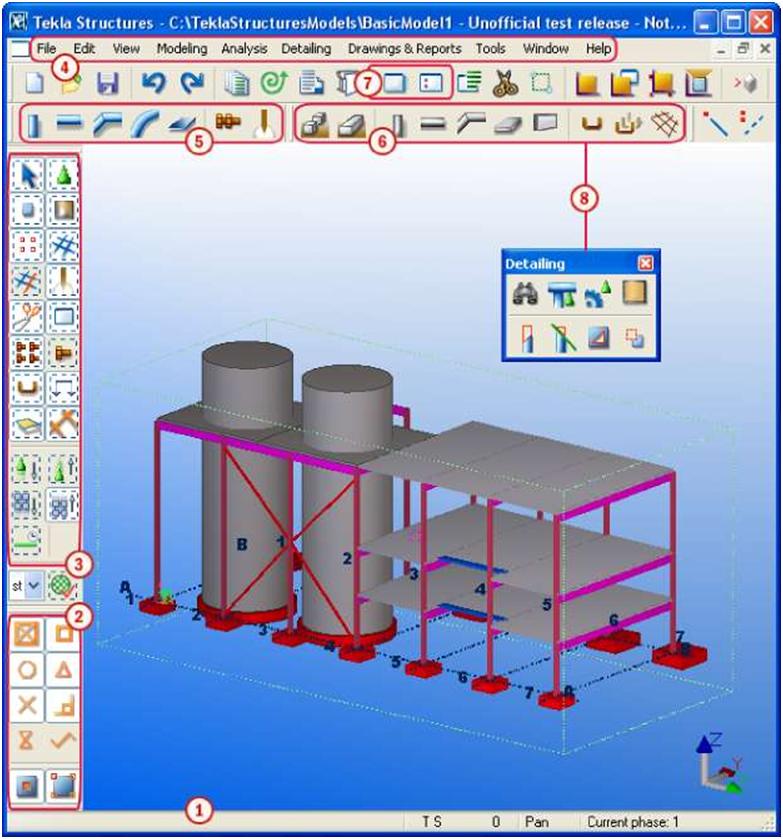
Status bar Tekla Structures displays prompts and messages on the status bar located at the bottom of the Tekla Structures window. The status bar also displays the following information: • The status of Xsnap (T), SmartSelect (S), and Drag and drop (D) • The level in assembly or component hierarchy (0–9) • The middle mouse button mode (Pan or Scroll) • The current phase • The number of selected objects and handles. 
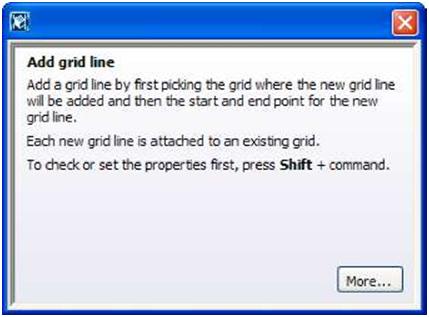
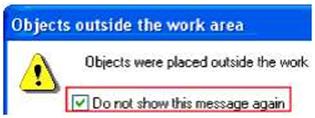
Warning Tekla Structures displays warning messages when necessary, for example when you are about messages to copy or move objects outside the work area. To prevent Tekla Structures from displaying the warning messages again, select the Do not show this message again checkbox. |
||
To re-display the warning messages, press Shift when the warning message should appear, for example when you are copying or moving objects outside the work area, and Tekla Structures displays the warning message again. A typical Windows workspace can contain many windows. You can stack windows on the workspace, just like sheets of paper on a desk. Windows may partially or completely hide other windows. Only one window is active at a time, but Tekla Structures may also produce information in the inactive windows. |
||
22 TEKLA STRUCTURES 14.0 Introduction |
||
Use the commands on the Window menu and View menu to control the windows. | |||||
Command | Icon | Description | |||
Window > Cascade | Shows all open windows in a cascaded arrangement. | ||||
Window > Tile Horizontally | Shows all open windows tiled horizontally. | ||||
Window > Tile Vertically | \m | Shows all open windows tiled vertically. | |||
Window > Close All | 3 | Closes all the windows on the screen. | |||
View > Update All | c5 | Updates and displays the contents of all windows. | |||
View > Redraw All | a | Recalculates and redraws the contents of all windows. | |||
^ | You cannot use the Cascade, Tile Horizontally, and Tile Vertically commands for windows that you can move outside the Tekla Structures window. For more information on moving part and component basic views and zoom windows across the entire Windows desktop, see XS_MDIVIEWPARENT, XS_MDIZOOMPARENT, and XS_MDIBASICVIEWPARENT in the online help. | ||||